
There are a couple of electronic signature applications available in the market today. What if the client isn't willing to pay an additional fee for the same? We have come across similar scenarios where real estate companies dropped the plan of integrating electronic signatures to the forms.
We found a way to resolve this issue (partially, of course), but it’s worth it. We did this by integrating PowerApps with SharePoint Lists where the signature image can be captured using the Pen Input Control in PowerApps. This image can then be stored in the SharePoint Lists.
However, you cannot save attachments to SharePoint Lists as PowerApps supports only “read-only attachments”.
Support for adding attachments by selecting pictures from a gallery or taking one with a camera is expected to roll out in late June 2018.
However, other attachments improvements, including increasing the maximum file size for new attachments have been delayed and won't be expected to ship before September 2018.
Also Read:
Microsoft PowerApps Accelerate How Business Apps are Built
Creating set of images:
- Add a Pen input control and call it Signatures, set its ShowControls property to true.
- Next, add a Button control, move it below Signatures, and set Text property of Button control to show Add.
- Set OnSelect property of Button control to:
Collect(Doodles, {Sketch:Signatures.Image})

By following the steps above, you can create a collection of signature images.
We can use Microsoft Flow to save these image collections from PowerApp to SharePoint. Let’s see on how to configure this:
As you may know, a flow can only accept strings as input and not collection of items from PowerApps. As a work around, we will link the data into one string and then split the data in Microsoft Flow.
This is how the data gets passed:
Monday, June 24, 2018SS.jpg|data:image/jpeg;base64,<data>#
Monday, June 24, 2018TR.jpg|data:image/jpeg;base64,<data>#
You can see that the beginning of the file name comes with a date followed by “|” for separating file name from base64 encoded image. The hash (#) separates each image from other.
Next, create a flow called “Saved Images”
Add a new step (PowerApps) with a compose step as shown below:
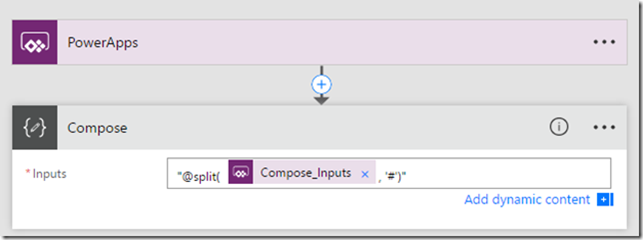
In Inputs field, write the following code (In the compose step, select Ask in PowerApps before doing this):
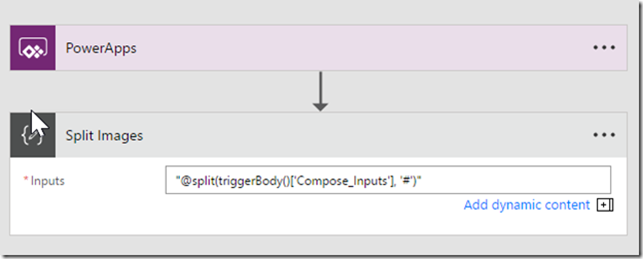
"@split(triggerBody()['Compose_Inputs'], '#')"
Rename compose action to “Split images”. This will help in splitting incoming strings on character #, creating an array with one item per image.
Please note that you need to include double quotes around the formula.
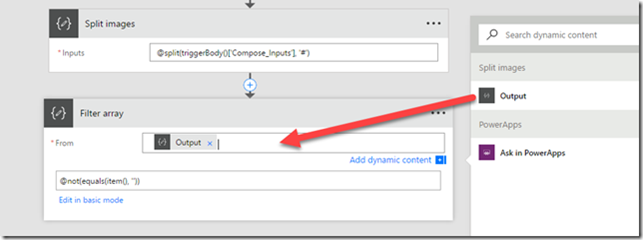
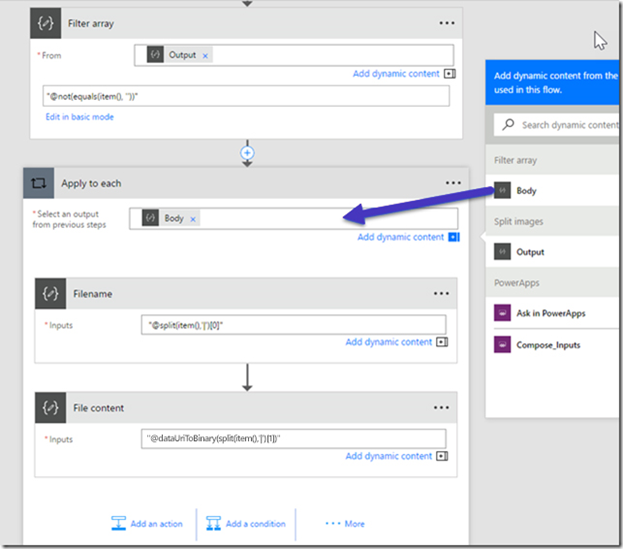
Add “Filter array” action below Split Images action. This will help in removing empty elements that you get at the end while creating data strings in PowerApps. Use Output from the previous step as From field. Once done, click “Edit in advanced mode” and add the below formula:
@not(equals(item(), ''))
This will help you to remove empty values.
Below Filter array action, add an apply to each loop, so the image gets processed when sent over.
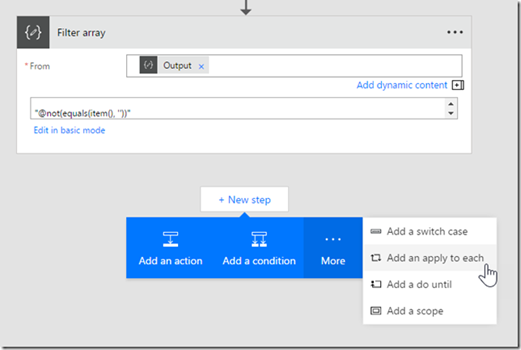
Now, select Body output from Filter array step in Apply to each step.

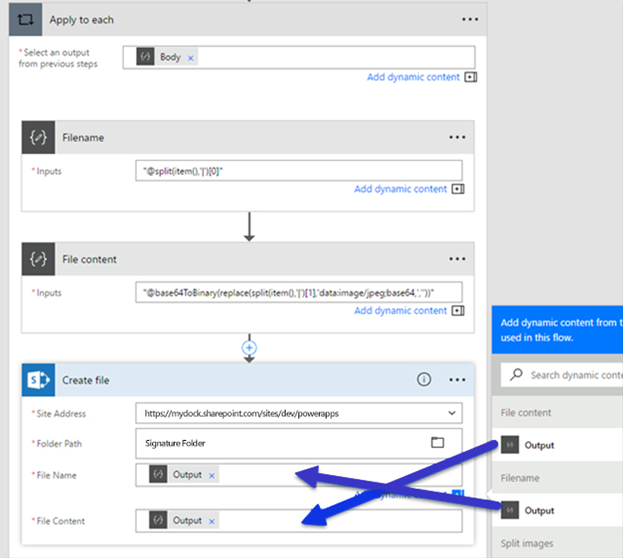
In Apply to each section, add two compose steps. Rename one to “Filename” and the other to “File content”.
For filename add the expression:
"@split(item(),'|')[0]"
For file content add the expression:
"@dataUriToBinary(split(item(),'|')[1])"
Finally, you need to add an action step for creating a file in Microsoft SharePoint.
The last part is adding an action step to create a file in SharePoint. Pick a site and library and assign the values from the previous compose steps.
Configuring your PowerApp
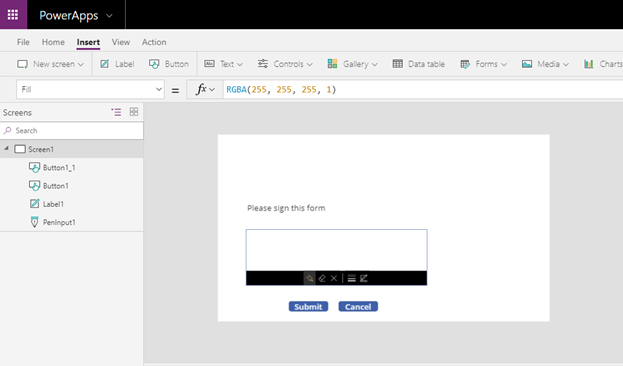
We have added a text field and a Pen Input control in this app as shown above. When the signature is captured, it converts into an image file and sent over to SharePoint.
Do you have additional questions about this process? For further explanation, send us an email at info@mydock365.com.

Book a Live demo
Schedule a live demo of Dock 365's Contract Management Software now.