Among the long list of applications provided by Microsoft, we would like to consider the Planner as a game-changer. It is one of the most underused software solutions by most businesses. Even after getting a Microsoft 365 subscription, many businesses are still not exploiting the potential of these productivity tools to the maximum. Here we are trying to explain how businesses and organizations can make the most of Microsoft Planner. Knowing how to use Microsoft planner gives your workforce a lot of advantages when it comes to handling tasks, and getting work done effortlessly. Being a to-do app that is bundled with Microsoft 365, the Planner helps you to create tasks, assign them to your team members and keep checking progress easily.
How Planner Can Make A Difference
Creating tasks and assigning it to team members is a continuous process inside all organizations and businesses. How many of you are doing it in a systematic and organized manner? You can change this anytime with Microsoft Planner. The biggest difference Microsoft Planner brings to an organization when compared to other to-do apps is that it is team focused. This different approach helps you to achieve more productivity and control on your team, especially when you are processing a complex task with a specialized team. How to use Microsoft Planner effectively? The easiest and effective way to use Planner now is from Microsoft Teams. You do not need to switch applications to manage your tasks in Planner now. Let us see what you can do with Planner in Microsoft Teams.
What Are the Things You Can Do with Planner
To start creating tasks, assigning it to your team members, and keep checking progress from Microsoft Teams, you need to create a team first. You can also go with an already existing team if you wish. After creating the team, you need to add members to it and add the Planner app as a tab to the team. Here is the step by step instructions you need to follow to learn how to use Microsoft Planner in Teams effectively.
- Go to Microsoft Teams and click on Teams option in the left sidebar.
- Choose Join or create a team from the bottom.
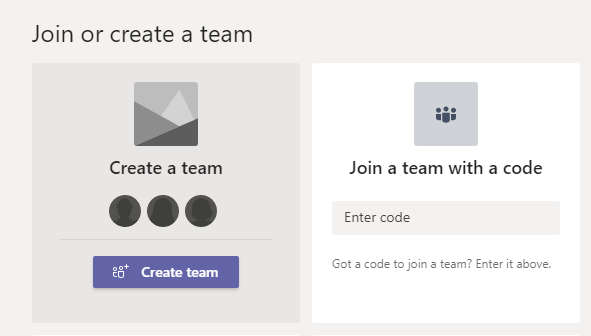
- Click on Create team button and choose From scratch.
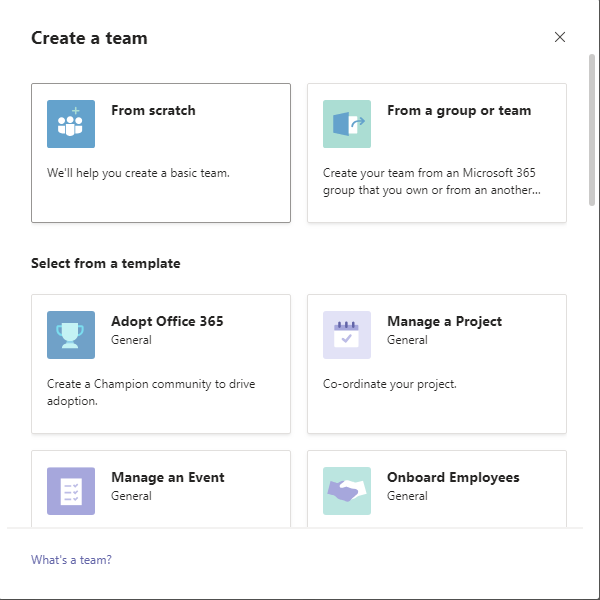
- You can also choose From a group or team if you prefer.
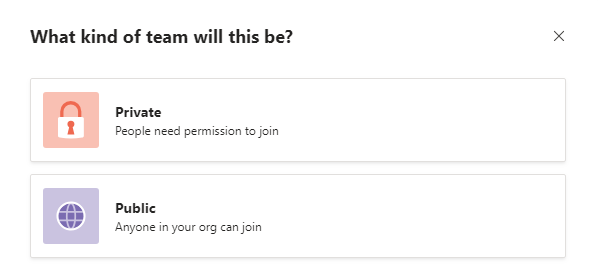
- Make it a public group by clicking on Public option in the next window.
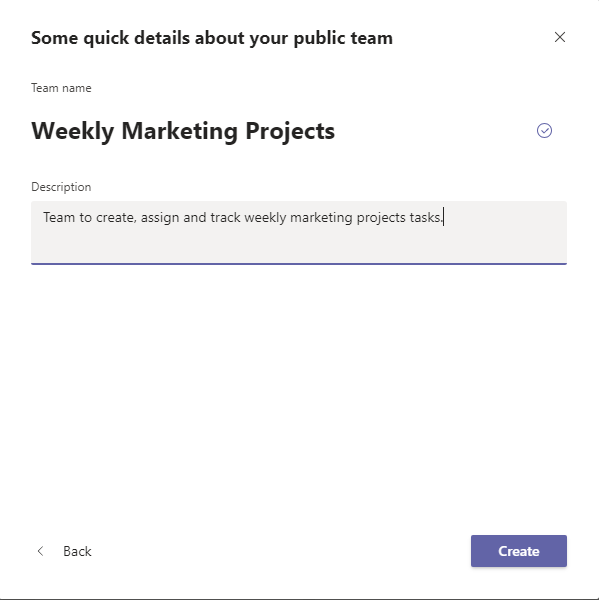
- Give the group an appropriate name and description and click Create.
- Add team members to the team and assign them appropriate roles.
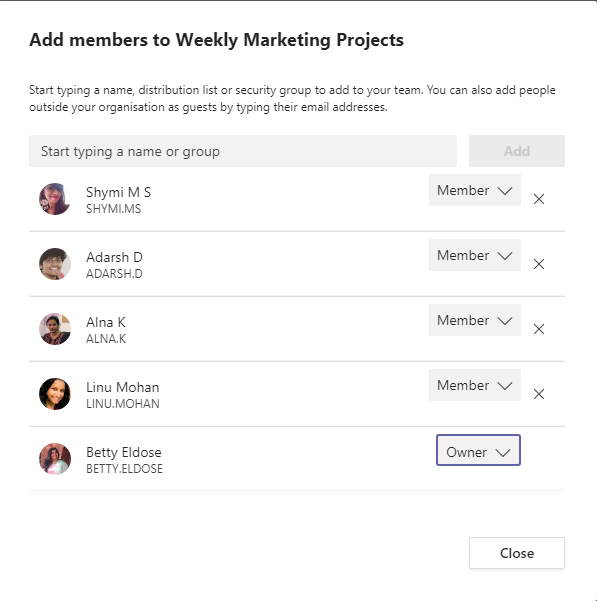
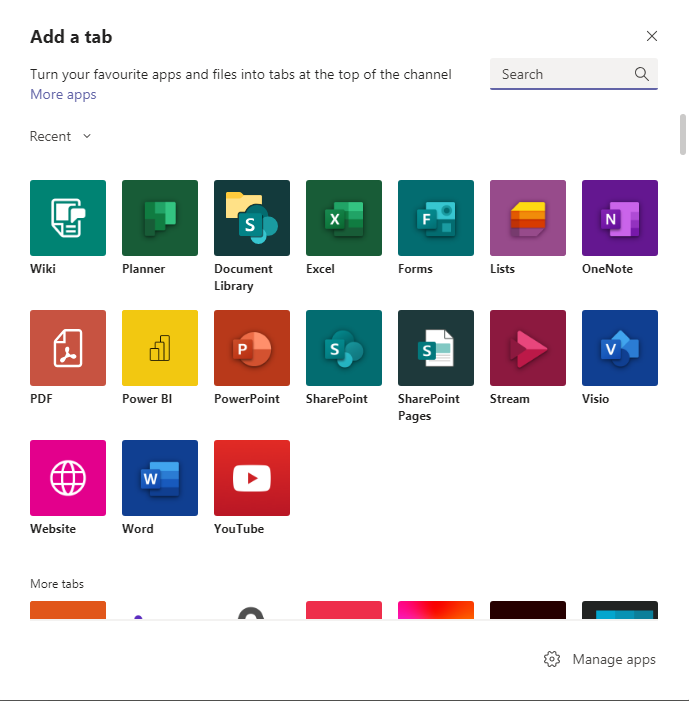
- Go to the general tab and click on the + icon on the tabs and choose Planner app.
- Give an appropriate name to the plan you wish to create and click Save.
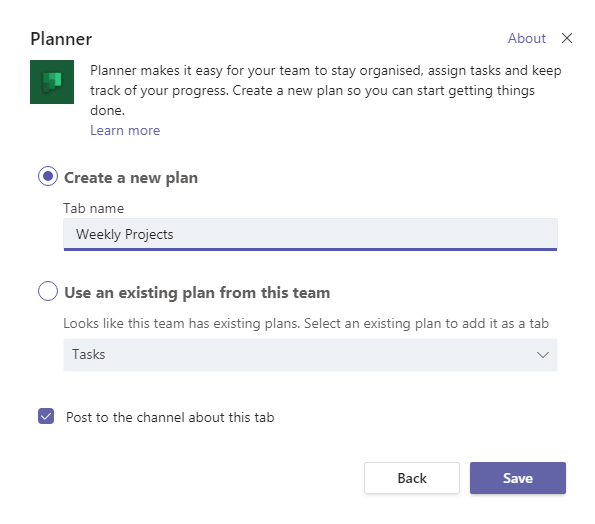
- You can also choose an existing plan.
- You can also choose Post to the channel about this tab option so everyone will know about it and will be able to access it easily.
- The next step is to go to the planner tab by clicking on it and create buckets to group tasks effectively.
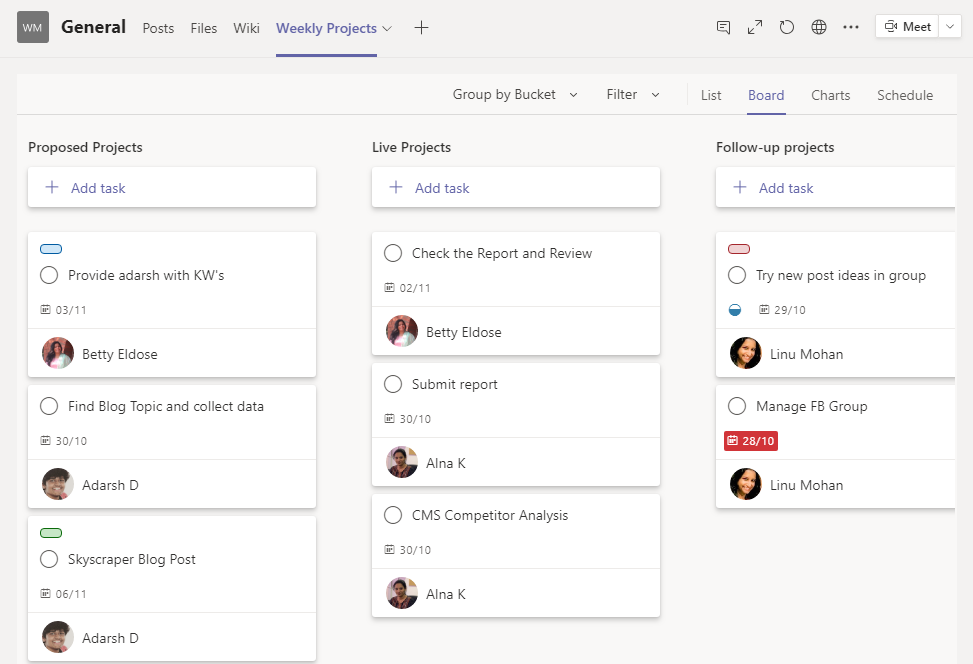
- We are creating 3 buckets here Proposed projects, Live projects, and Follow-up projects.
- Once you have created buckets to logically group all your tasks related to weekly projects, you can now add tasks.
How to Use Planner to Keep Your Tasks Organized
You can now add enough tasks under each bucket. You can add any number of tasks, small or big. This will let you keep all your tasks related processes organized and easy to track. Here are a few things you need to know to keep your tasks organized with Microsoft Planner.
- Assign labels to each task to define priority. You can also define these labels to make them more effective.
- You can click on the ellipses at the top of each task to access options like Copy task, Copy link to the task, Move task, Delete, etc.
- Click on the task to get a detailed view of all information regarding it.
- From there you can edit and update all details regarding the task such as progress, priority, start and due date, notes, attachments, checklists, comments, etc.
- You can also try different views to analyse and review each task and buckets perfectly.
- Check, List, Schedule, and Board views have their highlights.
- The schedule view even allows you to create tasks from the plus icon next to each icon in the calendar.
- There are also ample filter options at the top which allows you to filter tasks based on priority, date, user, label, etc.
- We have already grouped the tasks in buckets, but we can also group the tasks by progress, due date, assigned to, priority, and labels, by using the Group by option at the top.
This is basically how you can access Planner from Microsoft Teams and use it effectively. We will be doing a blog to show you how to use Microsoft Planner from outside Microsoft Teams soon. Stay tuned!
Have a good day.
Book a Live demo
Schedule a live demo of Dock 365's Contract Management Software now.

Written by Alex K Joseph
Alex Joseph is a Digital Marketing Strategist with explicit knowledge in Content Marketing and Microsoft Technologies. A writer by day, Alex is a night owl and a DIYer. Alex's theory is to make businesses achieve success with modern solutions and smart exploitation of resources.


-2.webp)

