
Have you tried working on the co-authoring feature? Interesting, isn’t it? It's available for both Excel and Word Online and will be available for other Office Solutions in the future.
Watch: SharePoint Co-authoring Feature - Training (Microsoft Word)
For the users who haven’t heard about SharePoint co-authoring, it helps multiple users to work on the same documents at the same time. It is just the opposite of check-in and check-out feature for document management in SharePoint.
But, for organizations that go about approval processes, co-authoring is never recommended at all. You need to have control over the documents where your colleagues are working on. Also, the check-out feature avoids other users to work on it and make changes until the SharePoint document owner has checked-in the document.
Checking Out a Document
The three ways for checking out a document:
- Manual check-out
- Automatic check-out
- Missing required column check-out
#1. What is a Manual Check-out
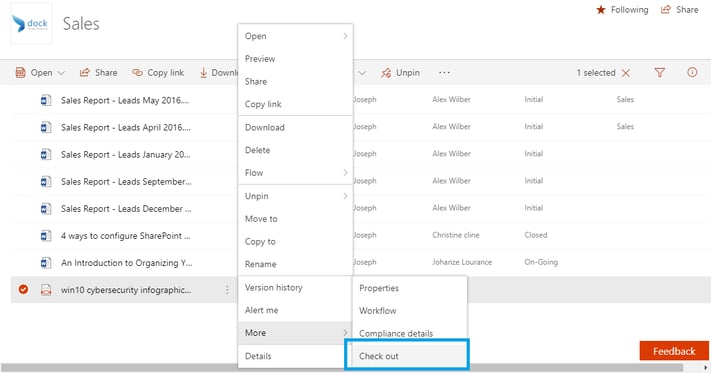
If you need to manually check-out a document, just right-click on the document you want to check out. Select More>Check-out.
#2. Auto Check-out
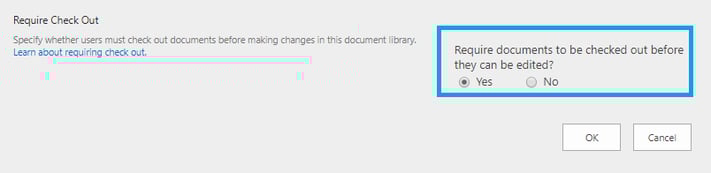
Auto checkout means that the users will be required to forcefully checkout a document before they make any changes to the document. To make this work, go to Library Settings>Versioning Settings and change “Require documents to be checked out before they can be edited”.
#3. What occurs when the document is checked out?
When a document is checked out, a small green arrow appears near the file icon. When hovered over the file with your cursor, it shows to whom the file is checked out to.
#4. What other users can see?
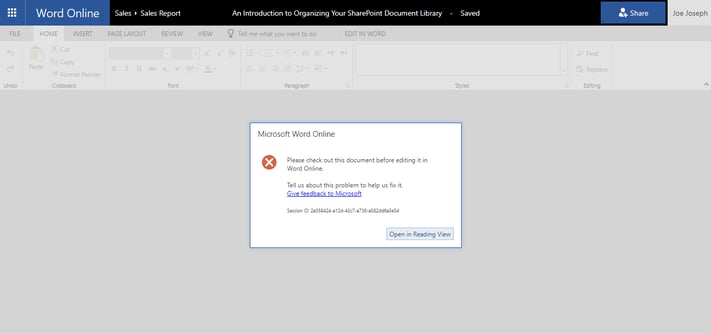
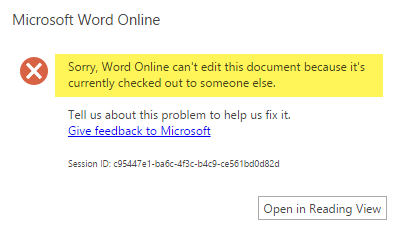
When checked out a file, your users will be able to access the latest version of the file in your document library. However, it will be available only on the “Read only” mode. This means that the users won’t be able to make any edits or changes to the file unless the original file is checked-in back.
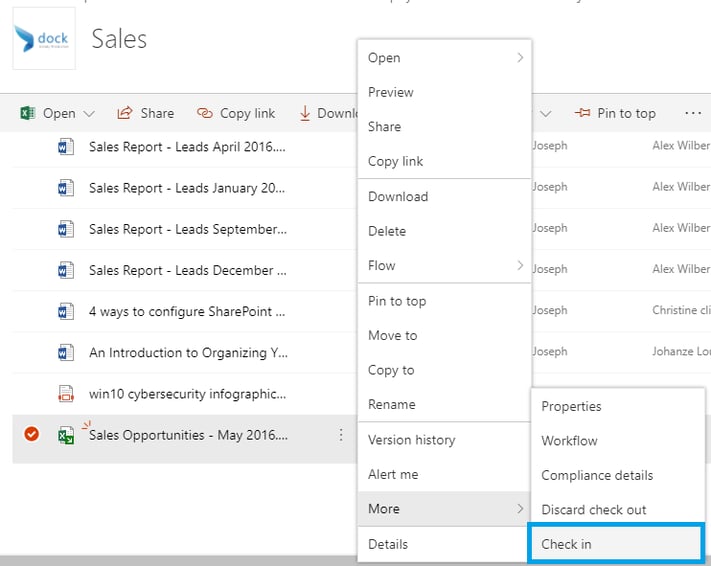
#5. Checking in the Document Back
How to check-in your own document
Once you have completed making all the changes and making the file available for your users to modify, check-in the file back by clicking on “Check-in” as shown in the image below:
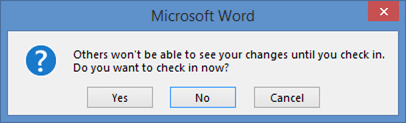
If the changes are done within the Office Apps, the system notifies you automatically when exiting the application.
For more SharePoint-related tutorials or blogs keep visiting our blog.

Book a Live demo
Schedule a live demo of Dock 365's Contract Management Software now.


(1).webp)


