As you probably already know, SharePoint Online is one of the best ways to store your organization's important documents. That's why it's important that you be able to find your files and information whenever you need them. Let's take a look at how you can improve how you company finds documents in SharePoint Online.
Content-
How to Find Documents in SharePoint Online
The easiest way to search for documents in SharePoint Online is to use the search bar at the top of your site.

By typing a phrase up here, SharePoint will show you a selection of files and folders that are related to your search query. For example, if you type "Security" into the search bar, SharePoint Online will show you documents with Security in the title, content, or metatags. It will generally order the content by what SharePoint deems most relevant to the search query.
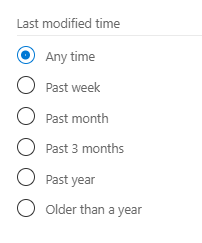
When you make a search, you can also filter out some of the content. Click Filters in the top right and you'll be able to change what information SharePoint displays based on your filters.
 This can be a good way to help you find information that you're looking for quickly.
While searching in SharePoint is powerful, there are multiple ways that you can improve how it works for your organization. However, before we look into that, let's take a look at how the search feature in SharePoint Online Works.
How Search in SharePoint Online Works
The files that SharePoint pulls up when you search on a site can come from anywhere on the site. However, SharePoint doesn't trawl through your whole site whenever you enter a search query. Instead it pulls results from the Search Index. The Search Index is a repository of all of the indexed content on your site. Only items that are in your search index can appear in search results. If you are interested in learning more about this process, we wrote a blog on the indexing and crawling process.
By default, SharePoint adds all of the content on your site into that site's search index. However, site owners and site collection administrators can modify what content appears in the search results.
How to Add/Exclude Sites in Search Results
Starting at the top, site owners have the ability to choose if content from their site can appear in search results. Let's take a look at how to either add or exclude a site:
- Go to the site you're wanting to modify.
- Click Settings and then Site settings.
- Under Search select Search and offline availability.
- You'll see a section that says Indexing Site Content. Under that you'll see Allow this site to appear in Search results. If you want the content to appear, select Yes. If you don't, click No.
How to Add/Exclude Content in a List/Library in Search Results
Site owners can also choose specific content from their site to not show up in search results. Let's take a look at how to modify that option:
- Go to the list or library you want to customize.
- Click Settings and then Site settings.
- Find Site Administration and then click Site Libraries and lists.
- Choose an item from the list.
- On the List Settings page, find General Settings and then Advanced settings.
- In the Search section, you'll see the section Allow items from this document library to appear in search results. If you want to keep them in, select Yes. If you don't, select No.
How to Exclude Content in Columns From Search Results
In addition to add/excluding sites and content, site owners can also choose whether to include content in specific columns in list or libraries in search results. Let's take a look at how to do that:
- Go to the site that contains the list/library.
- Click Settings and then Site settings.
- Under Search select Searchable columns.
- Find the Excluded Columns from Search Indexing section. Go to the Excluded section and check the box next to any Column Name you want to exclude from search results.
Beyond just choosing whether or not a site, list, or library will appear in search results, there are other things you can do to customize how your users search in your SharePoint sites.
How to Document Search in SharePoint Online
While we've written a more in-depth blog about this subject in the past, we'll do a brief overview of the tips you can use to make finding documents in SharePoint Online easier.
Check Titles
Always check the titles of your documents. Make sure they match the content of the document so that it will appear higher in relevant search results.
Use Metadata
SharePoint metadata is a great tool for sorting your documents. Make sure you're using accurate meta tags in all of your documents.
Add Common Value Default
You should set column value defaults at the folder level. This will automatically assign metadata to the files you create in that folder.
Use Document IDs
Document IDs are unique tags that are assigned to files in a site collection. If you know a document's ID, you can enter the ID into the search bar and find it easily.
Think About SEO
Often considered a marketing term, Search Engine Optimization also applies to search in SharePoint Online. Think about keywords and key phrases in a document and use variations on those keywords to make it easier for people to find the document.
Conclusion
It's amazing the level of control that SharePoint offers users to locate and find documents in SharePoint Online. Check out the options we've provided above to take control of how people find documents within your organization.
Book a Live demo
Schedule a live demo of Dock 365's Contract Management Software now.

Written by Quentin Russell
Quentin Russell is a Content Specialist with knowledge of Content Marketing and Social Media Marketing.


(1).webp)
