Most of us are familiar with Microsoft Teams meetings. Teams' meeting feature is remarkably efficient, built with several advantageous features. However, were you aware that Microsoft Teams offers the ability to schedule a webinar? In this blog, we'll show you how to create a webinar in Microsoft Teams.
The Difference Between Meetings and Webinars
Your typical Teams meeting will involve various activities including discussions, planning, sharing content, assigning tasks, and more. In webinars, the atmosphere and the roles are more well-defined and controlled. Webinars usually have predetermined presenters and registration forms for attendees.
How To Create A Webinar in Microsoft Teams
Complete the following steps to create a webinar in Microsoft Teams.
- First, go to Teams and click the Calendar option located at the left side menu bar.
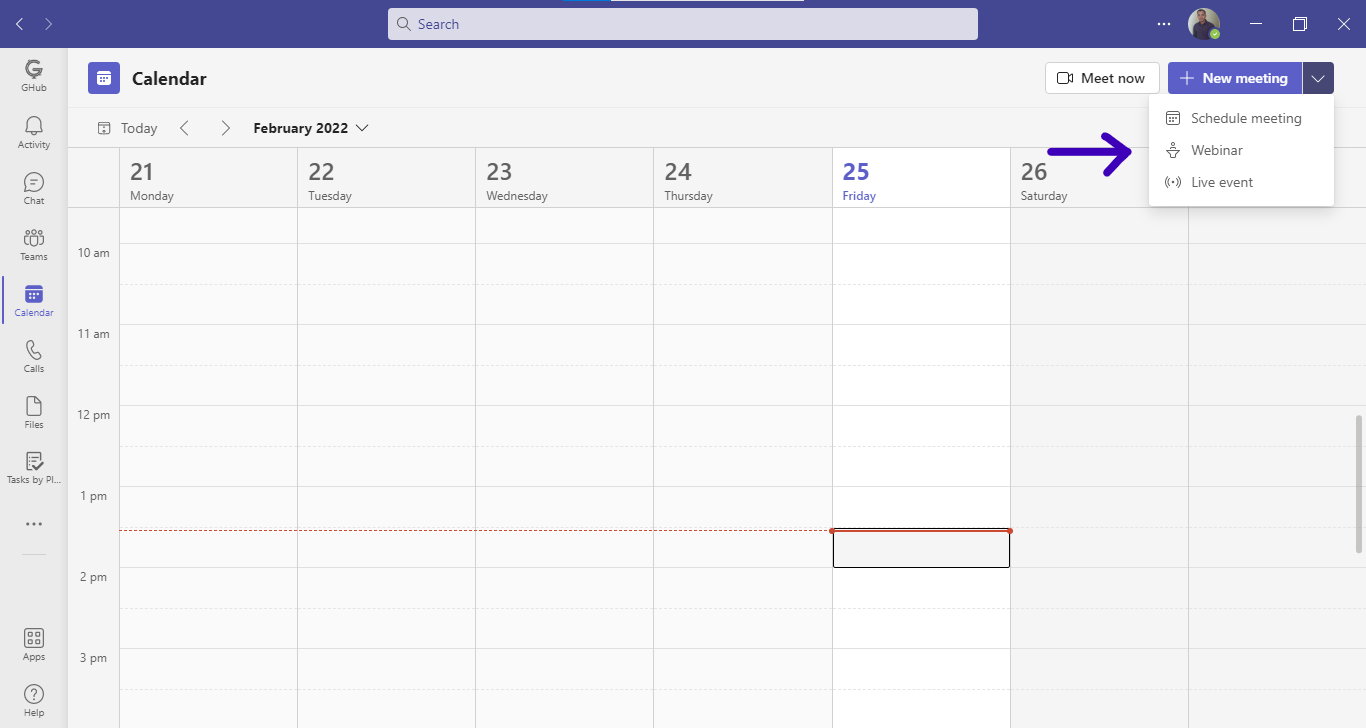
- From the Teams Calendar page, click the drop-down next to the New meeting option, then choose Webinar.
- A New webinar creation page will appear. Enter various information including Title, Presenters, Date, Time, Location, and Webinar description.
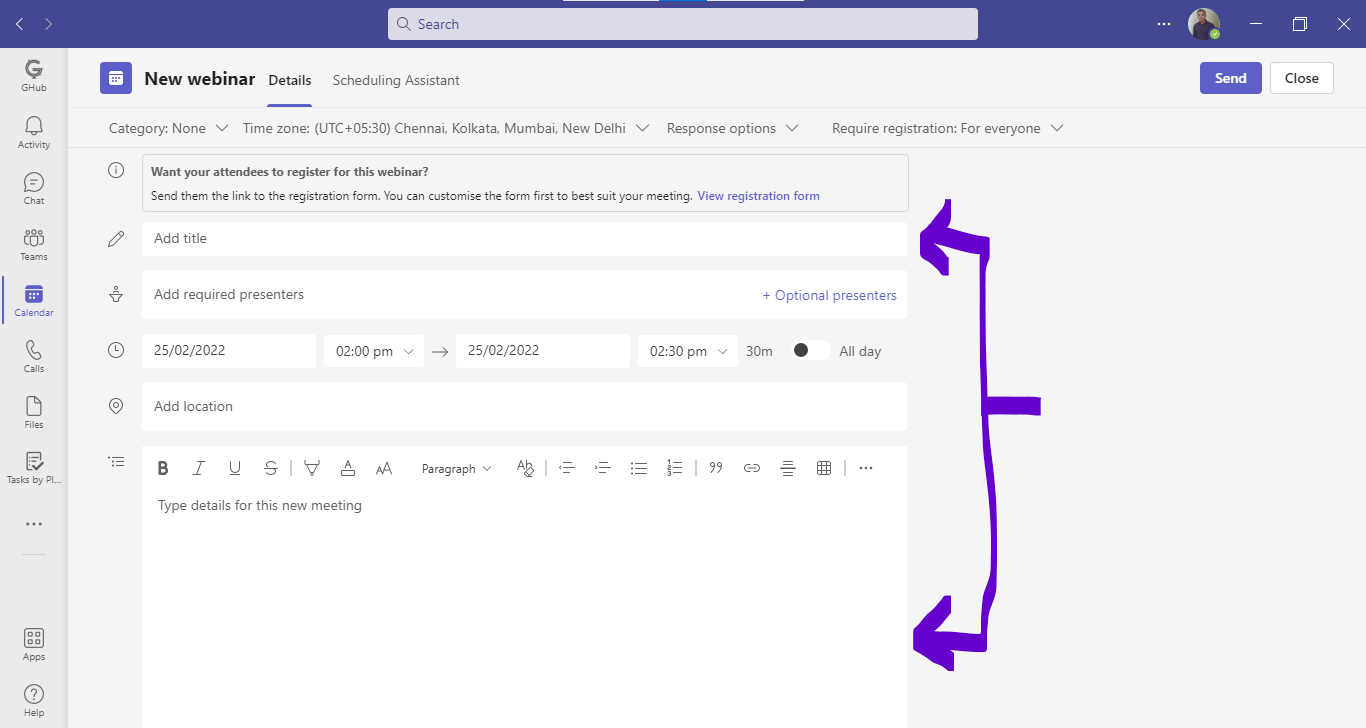
- You can also adjust details like Time zone, Category, Response options, and Require registration option at this stage.
- There is also an option to View registration form. We will first save the details entered thus far, and then we'll customize the registration form in the next step.
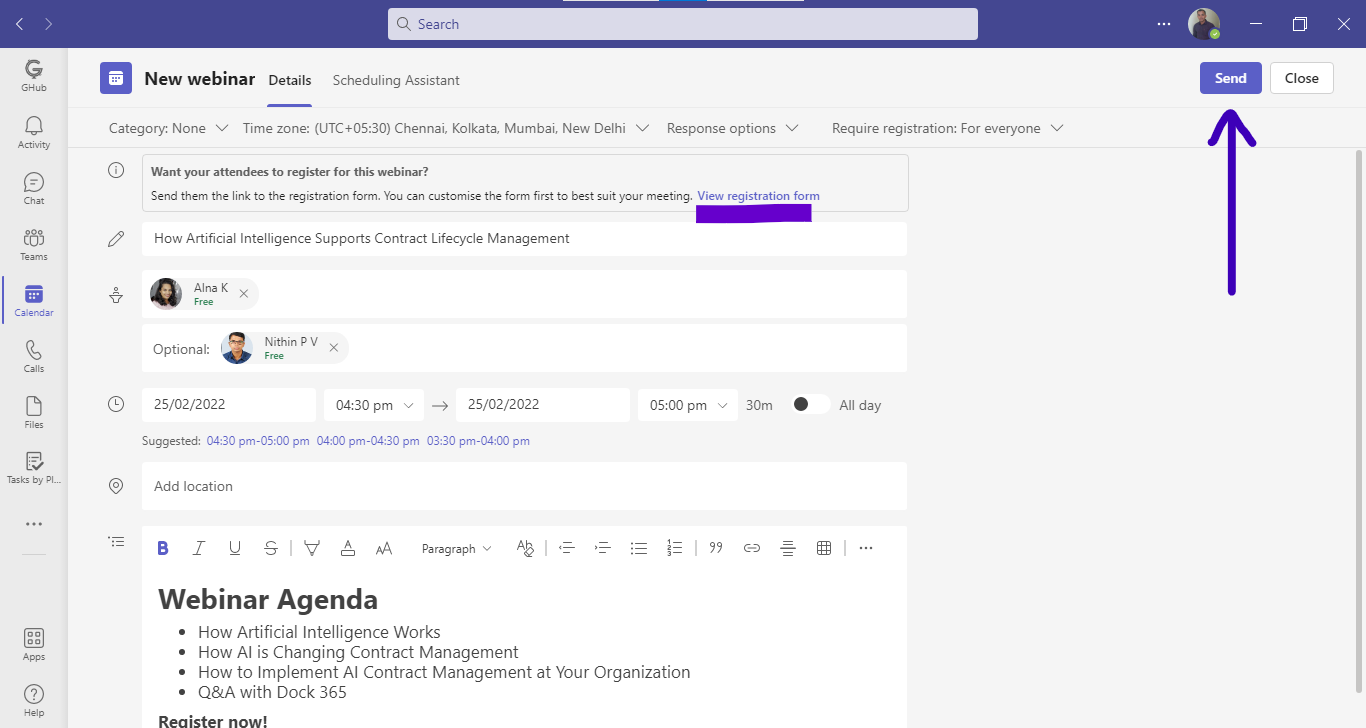
- Click Send located at the top to save the event and send invitations to the presenters assigned.
- Presenters will immediately receive an email invite.
How to Configure Webinar Registration Forms in Teams
Registration forms are necessary to effectively schedule webinars. You'll have to send the link to the registration form to people expected to attend the webinar. Let's learn how to customize the Teams webinar registration form.
- Go to your Teams Calendar and click a webinar event.
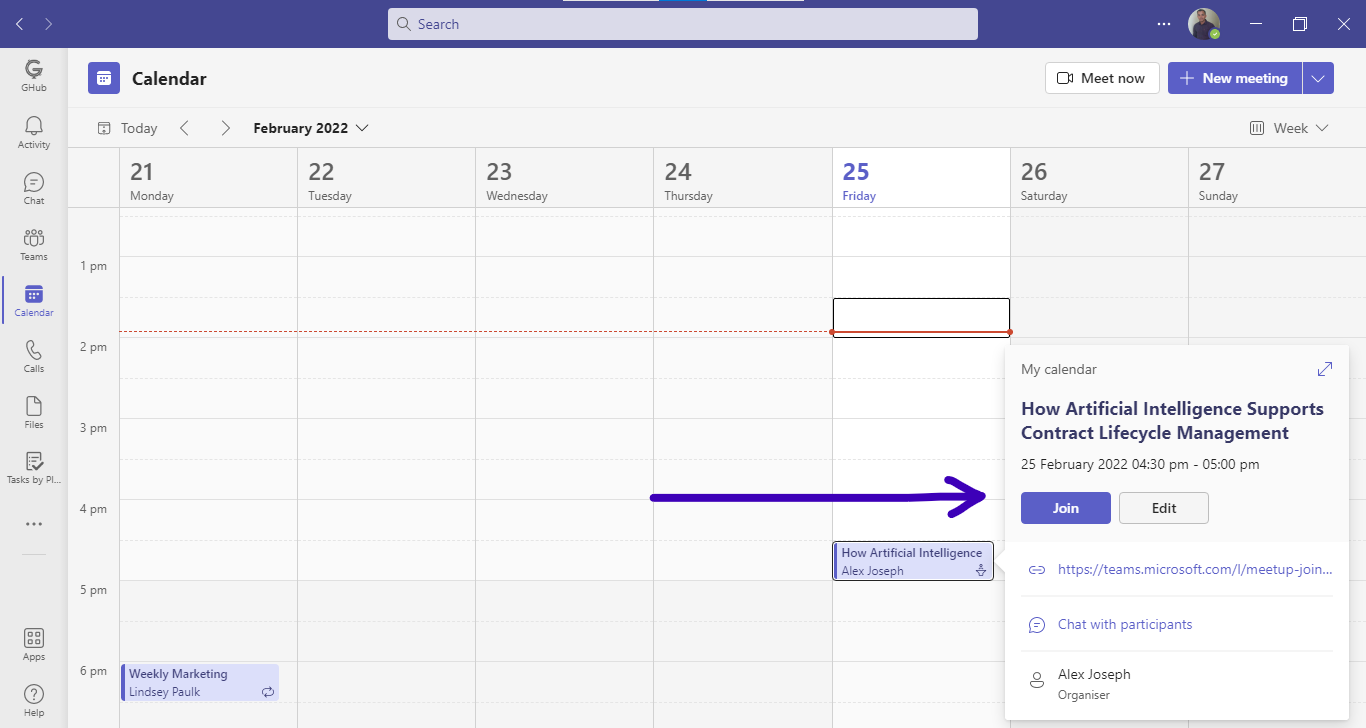
- Click Edit.
- In the webinar details page, click Customize registration form.
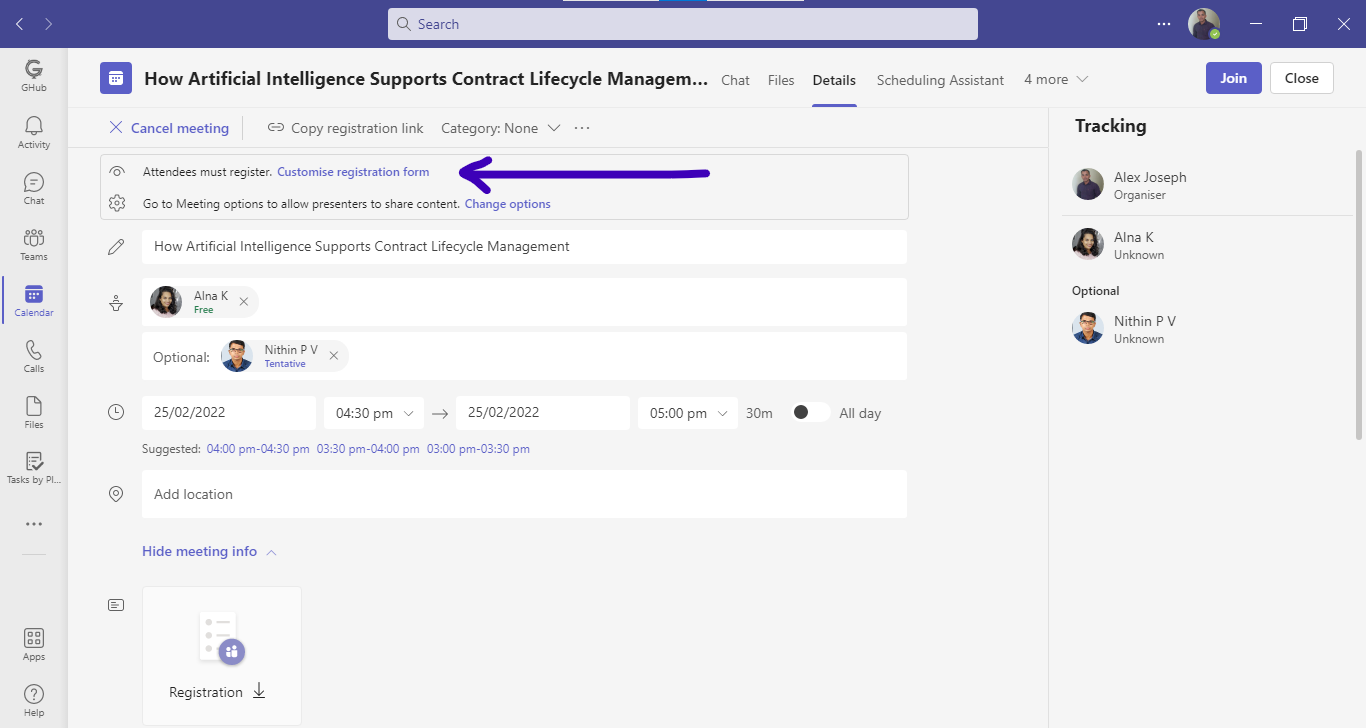
- You will then be taken to the Teams webinar registration form window.
- Click Edit.
- You can now upload a banner image for the webinar registration page.
- Add a title, update the date and time, and provide a description.
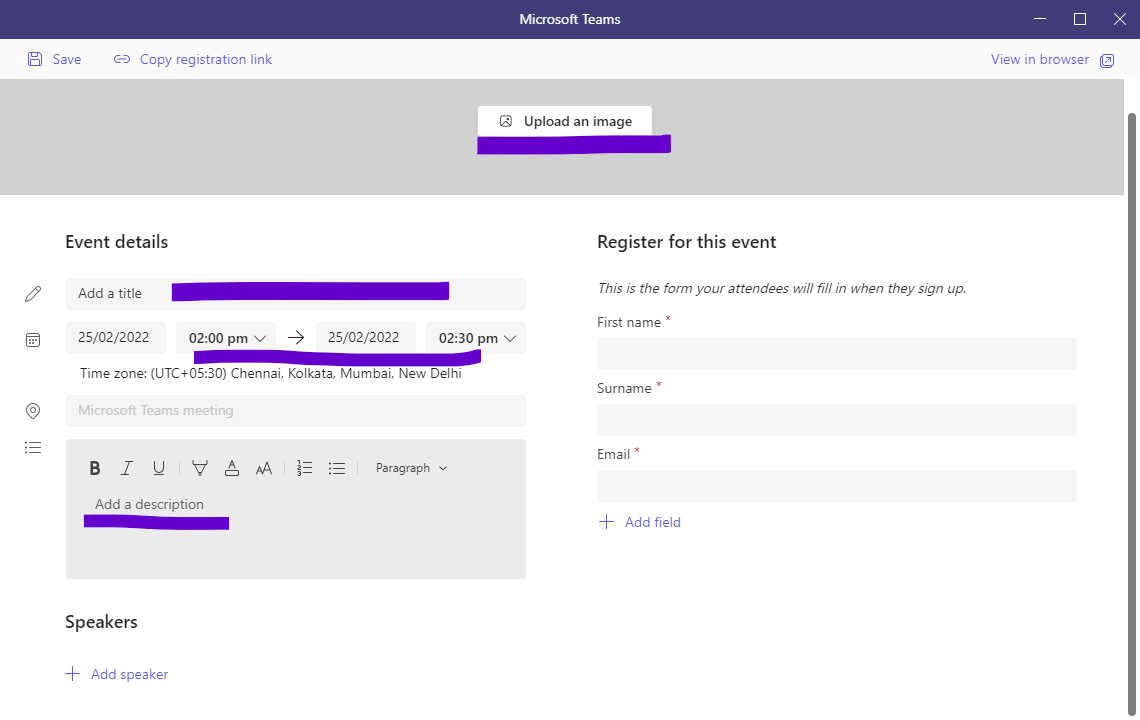
- Click Add speaker at the bottom and enter the speaker’s name and bio.
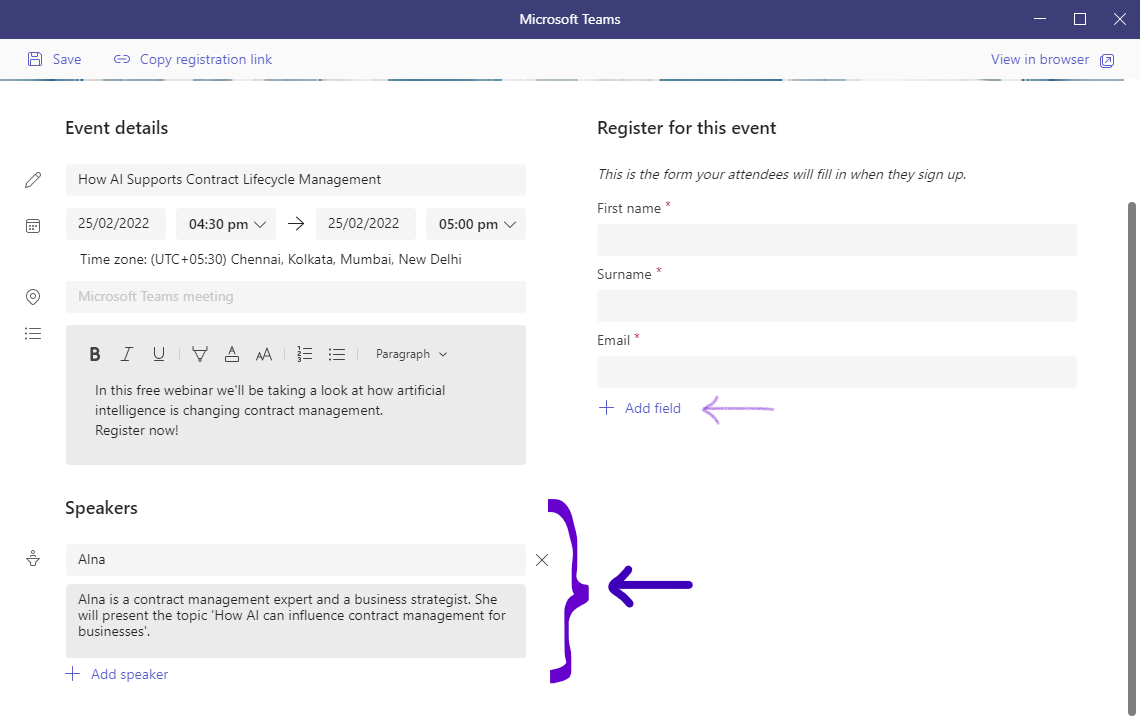
- If you wish to add any extra fields to the form, click Add field and choose appropriate options from the list.
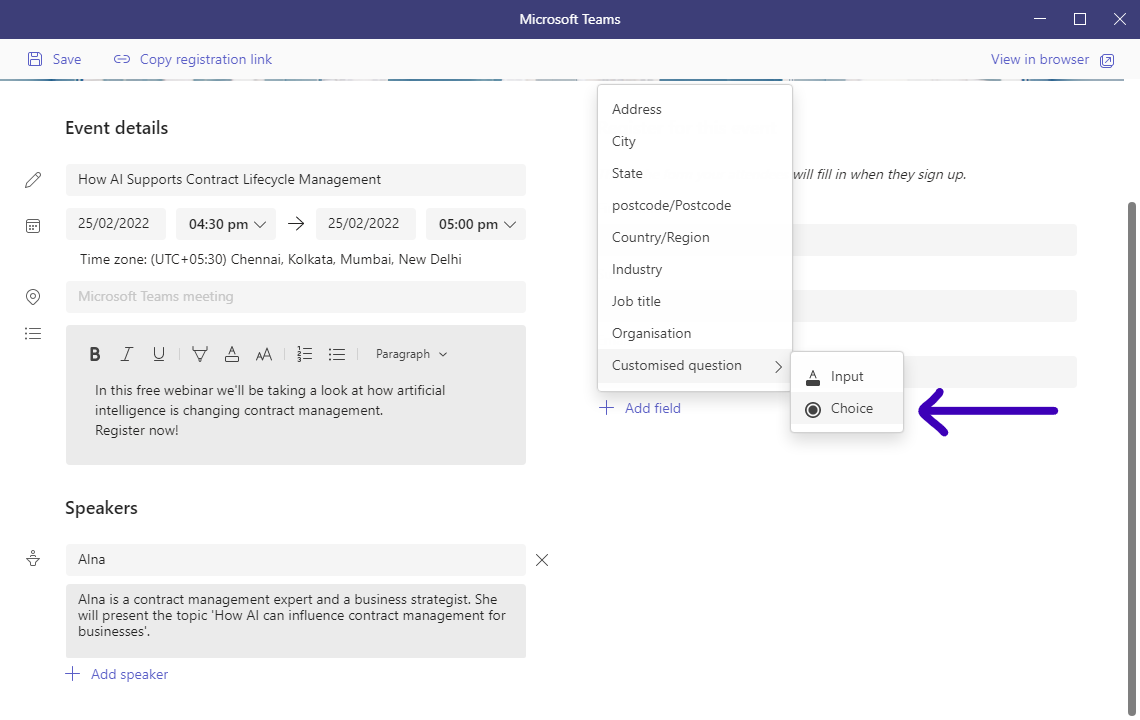
- In our demonstration, we are adding a customized question with choice-type answers.
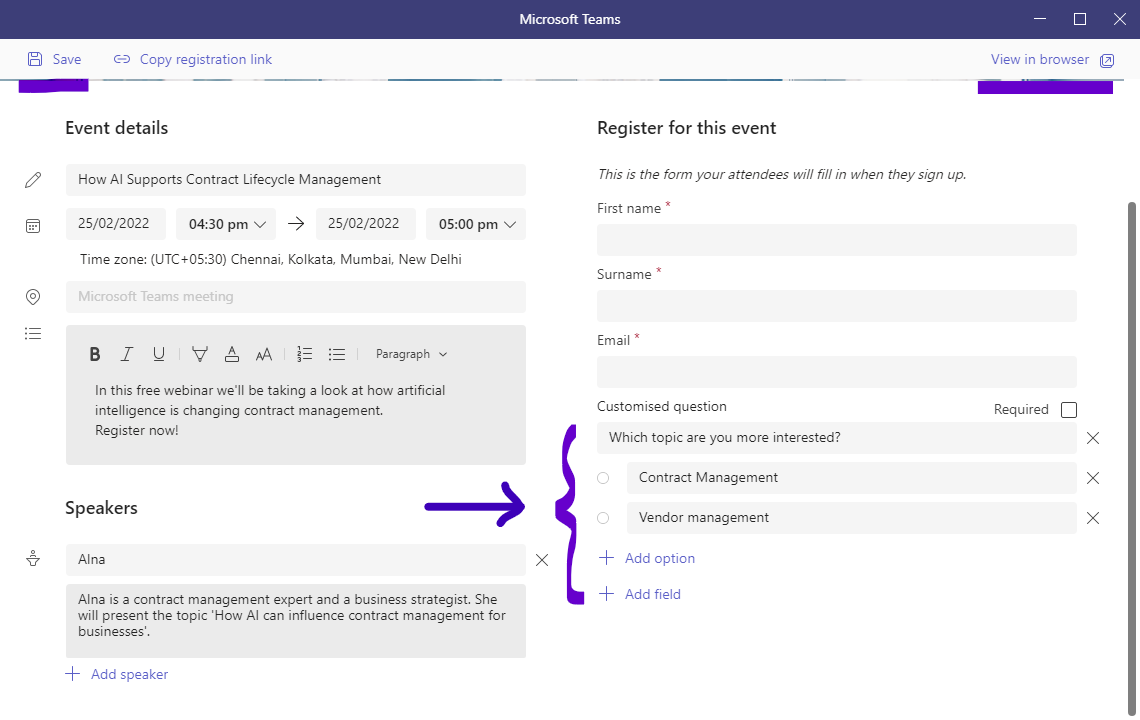
- Next, you will add the question and desired answer options.
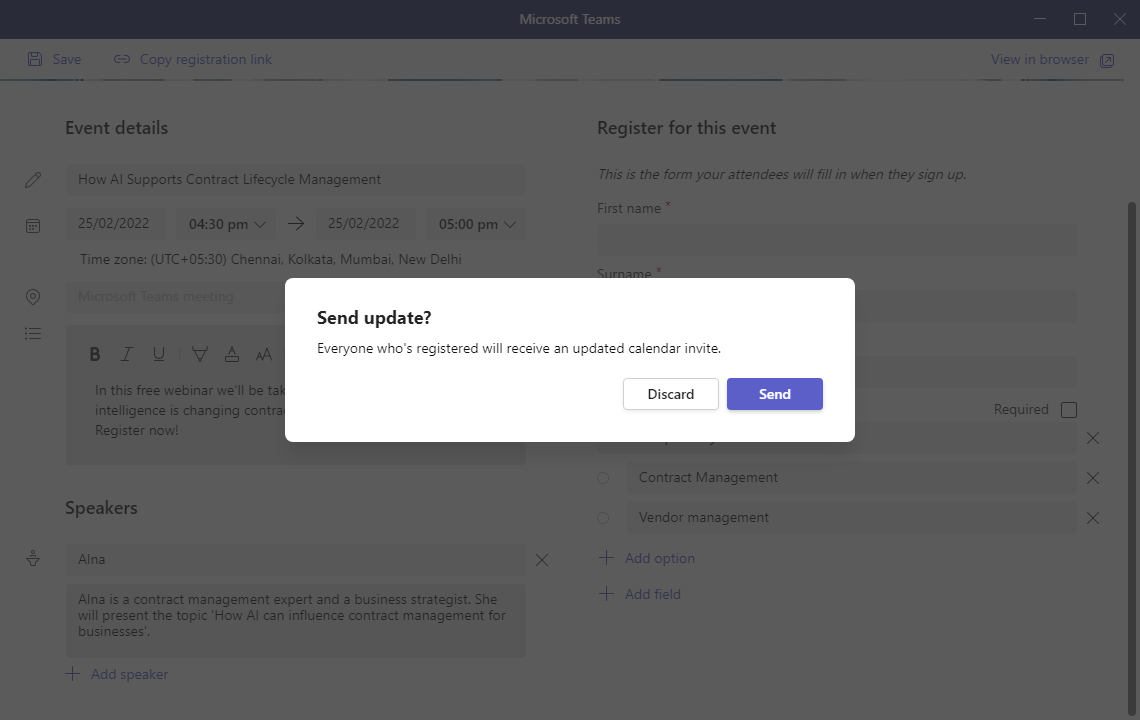
- Click Save at the top to update your changes.
- At this stage, an update notification is sent to users who have already registered for the event.
- Click Send to confirm.
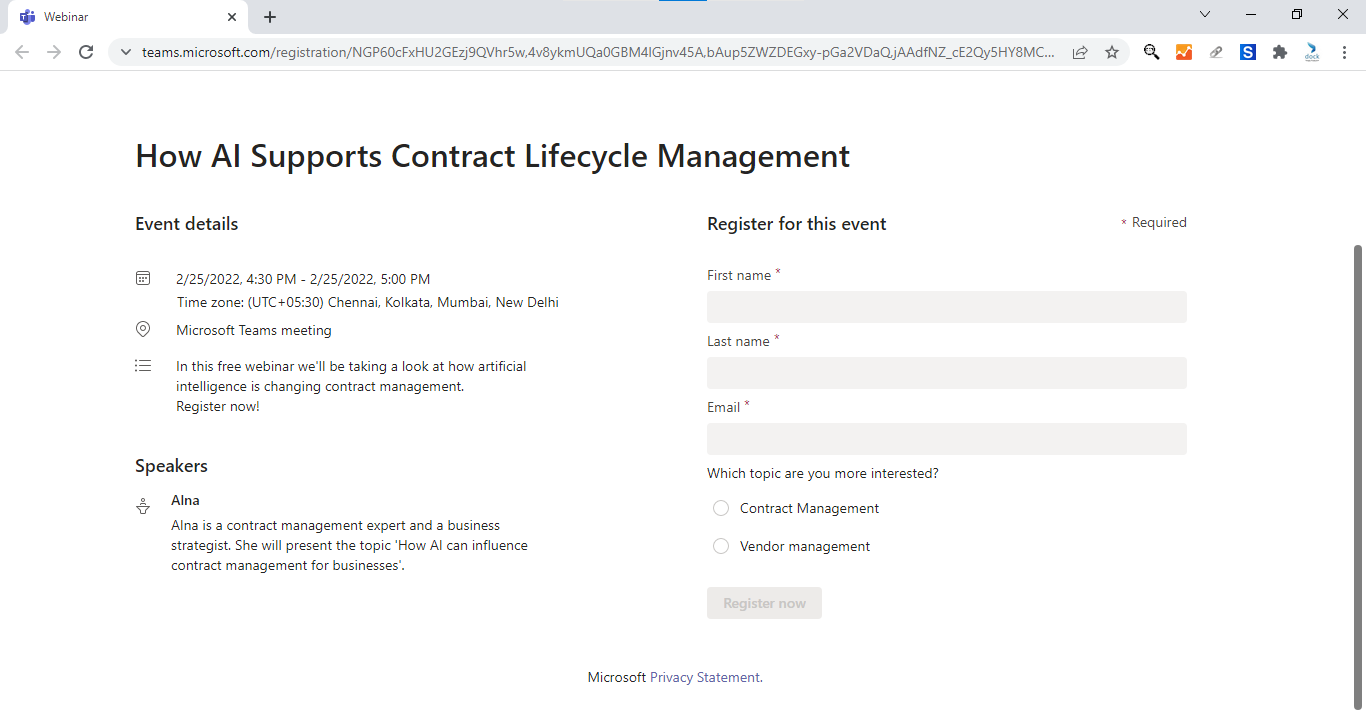
- Click View in browser to see a preview of the registration form.
- From the webinar details page, click Change options to adjust meeting options if desired.
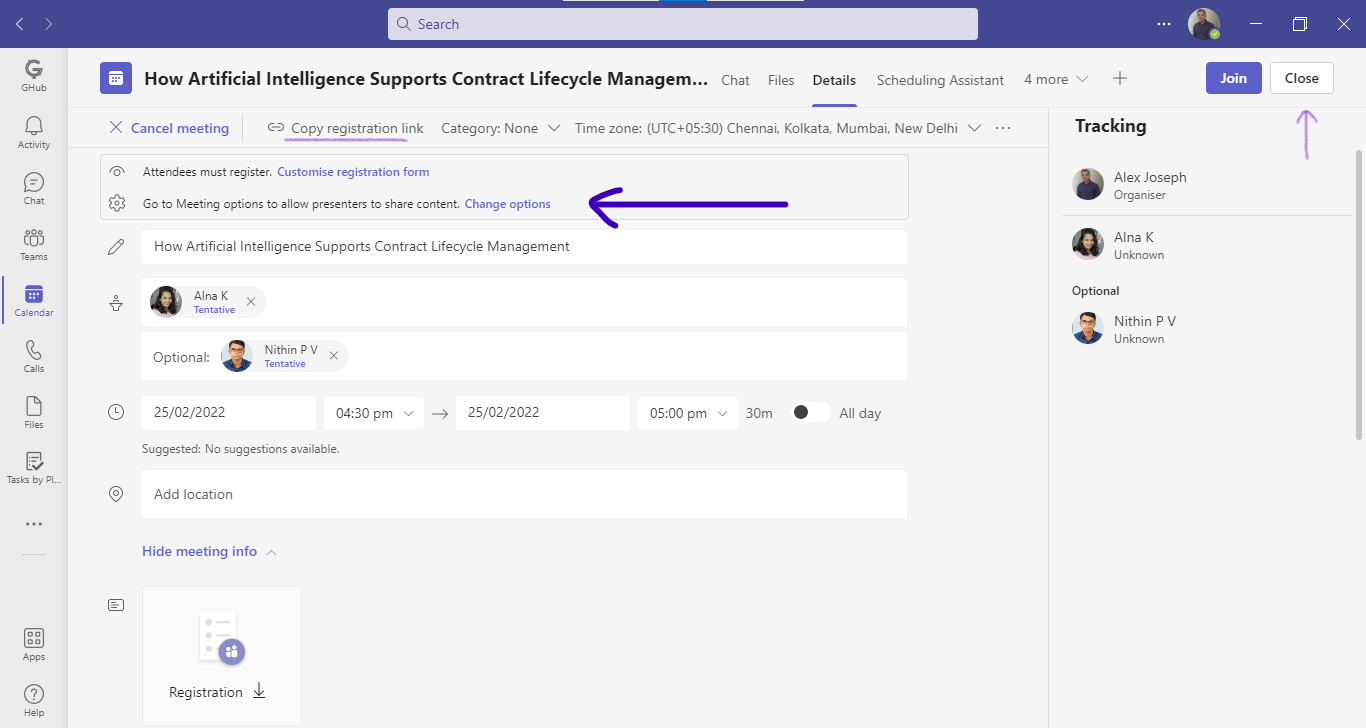
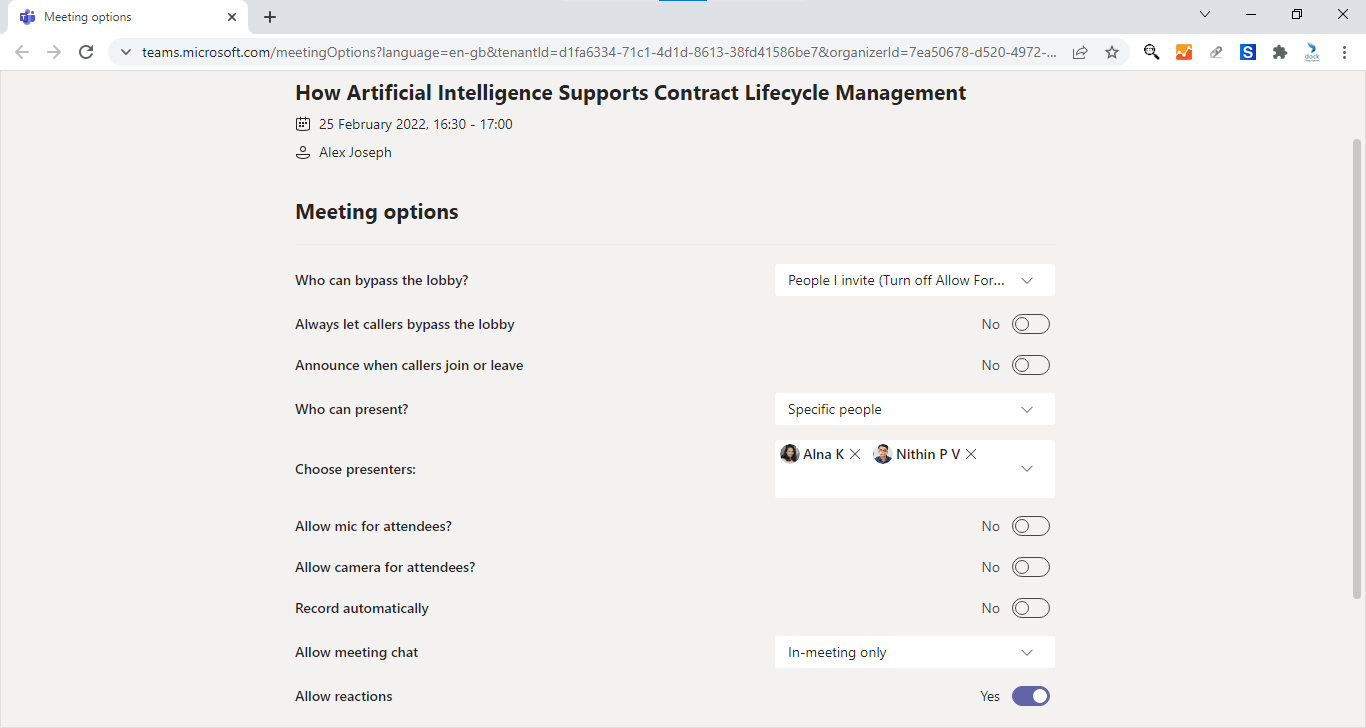
- You have now completed your webinar scheduling process.
- Click Copy registration link located at the top to send it to users expected to attend the event.
Use These Tips for Successful Teams Webinars
Schedule events at least 2 weeks in advance so potential attendees and presenters can plan ahead.
We recommend preparing your registration forms in a manner that provides presenters and hosts with the most useful details.
Last but not the least, share the registration form link with relevant users. Links can be easily shared through any medium, whether it's via email, social media, direct message... just ensure that it reaches everyone!
Try out these options and tips and let us know about your experience with creating a webinar in Teams. Have a great day.Book a Live demo
Schedule a live demo of Dock 365's Contract Management Software now.

Written by Alex K Joseph
Alex Joseph is a Digital Marketing Strategist with explicit knowledge in Content Marketing and Microsoft Technologies. A writer by day, Alex is a night owl and a DIYer. Alex's theory is to make businesses achieve success with modern solutions and smart exploitation of resources.


