
Office 365 comes with a standard, neat theme. However, it is important to customize the default theme for your organization to match it with your brand identity. Microsoft 365 admin center allows you to make some great changes to the theme, by which the top navigation will appear in a way you desire for everyone in your organization. Here are all the essential guidelines to customize the Office 365 theme for your organization.
The main customization's you can make to the Office 365 theme includes:
- Add company logo
- Change colors
- Add destination link to the logo
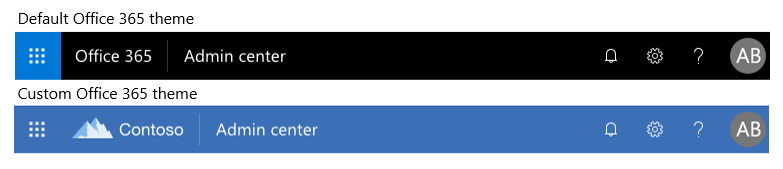
Compare the default and custom themes of Office 365 in the image below.
Customize Theme from Admin Center
You can get started with the customization process from the Microsoft 365 Admin Center.
Visit the admin center and Go to Settings > Organization profile page.
Click on Edit option placed next to Manage custom themes for your organization.
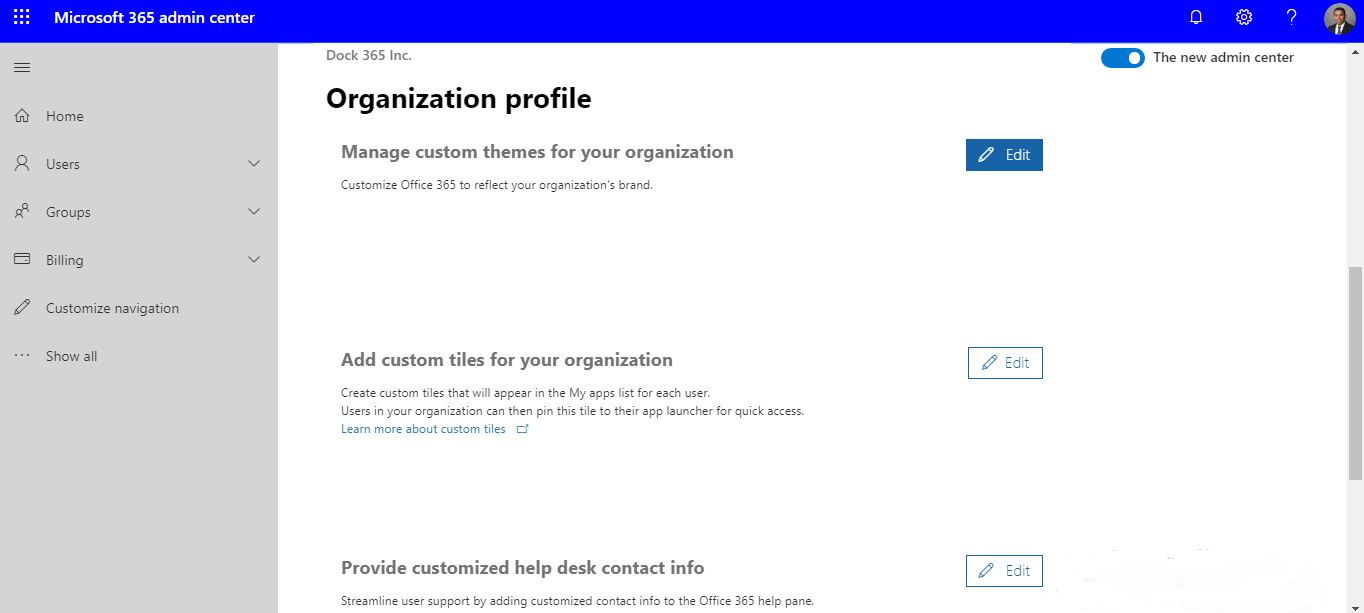
From here you can change certain elements you wish according to your organization’s branding guide and policies.
Theme elements you can change:
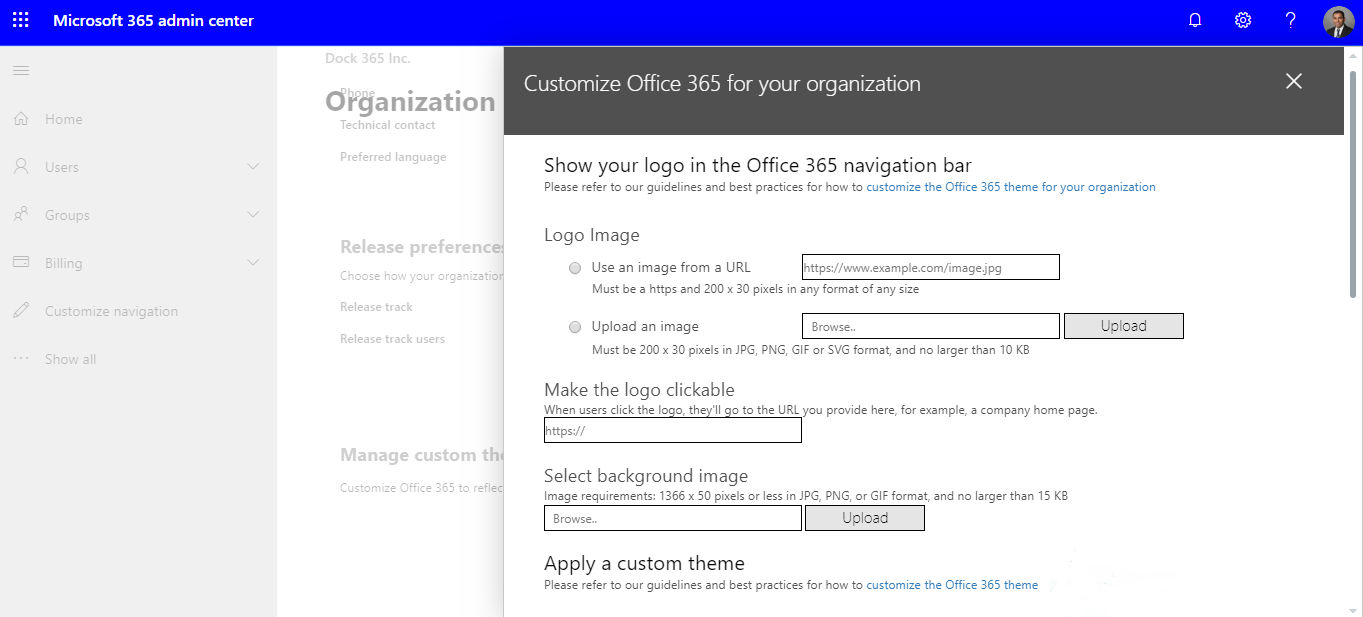
Logo Image
The logo is one of the most important branding aspects used by organizations, businesses, and companies. You can either upload an image or use an image from a URL. In case you are picking URL, ensure that the URL is using HTTPS and it is 200 x 30 pixels. Format and size are not a concern.
URL for a Clickable Logo
The logo in the top navigation bar can be made to a link to your company website or any other important company resource. You just need to enter the desired URL starting with http:// or https://.
Background Image
You can also set an image as a background by uploading it. Ensure that the image is of 1366 x 50 pixels and it is in either PNG, JPG, or GIF formats. The image should not be larger than 15 KB of size. It will now appear in the top navigation bar of all pages.
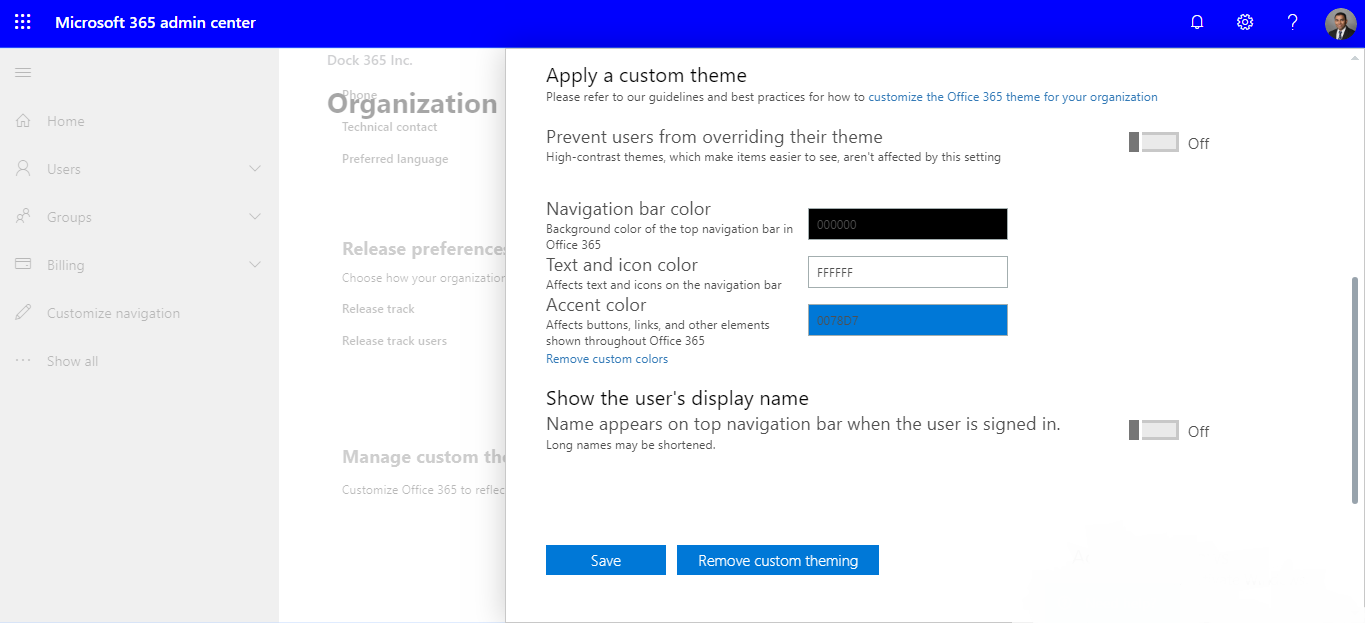
Prevent Users from Overriding Theme
The theme customization is performed by the admin of your Office 365 for business subscription. You can prevent anyone else from picking their theme from available theme selection, by flipping the ‘Prevent users from overriding theme’ toggle. They can still choose a high contrast theme.
Navigation Bar Background Color
This element allows you to set a specific background color for the navigation bar. The navigation bar appears the same for all the pages.
Text and Icons
Here you can set up the color for the text and icons that might appear in the top navigation bar.
Accent Color
The accent color element let you define the preferred color for the navigation bar button hover color and other page accents such as text and button on various applications.
User Name
The purpose of this element is to decide whether the user’s full name should be displayed at the top right of the page when the user is signed in. However, the photo or initials of the user will be displayed by default.
After setting all these elements in a preferred manner, you can click Save to apply the custom theme throughout your Microsoft 365. The admin center will be shown in the new theme right away, whereas the rest of Office 365 will be seen in the new theme shortly. If you wish to make any changes or if you want to remove the custom theme, you can always return to the theme page and pick Remove Custom Theme.

Learn about the best practices in customizing the Office 365 theme from our next blog!
Book a Live demo
Schedule a live demo of Dock 365's Contract Management Software now.