
Everyone loves to read content in their preferred language. When you have a diverse community in your organization, it's necessary to ensure that your content is available in various languages. Today, SharePoint Intranets are very common, and Microsoft SharePoint is equipped with an excellent multilingual feature, allowing users to configure SharePoint Communication Sites in multiple languages. Multilingual SharePoint sites serve to support teams by offering content that everyone can read in their preferred language. In today's blog, we share a step-by-step tutorial demonstrating how to create multilingual sites in SharePoint Online, as well as how to translate your SharePoint content to different languages.
How To Enable Multilingual Features in SharePoint Online
Complete the following steps to enable multilingual features in SharePoint Online.
- Go to the Communication site that you'd like to translate
- Click Settings and choose Site information
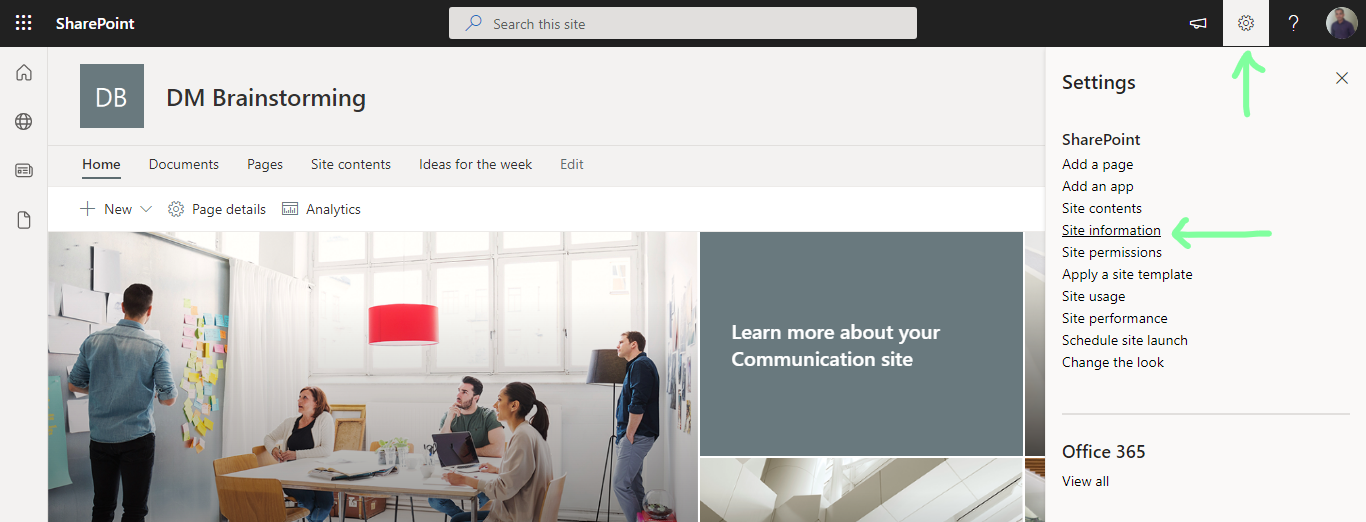
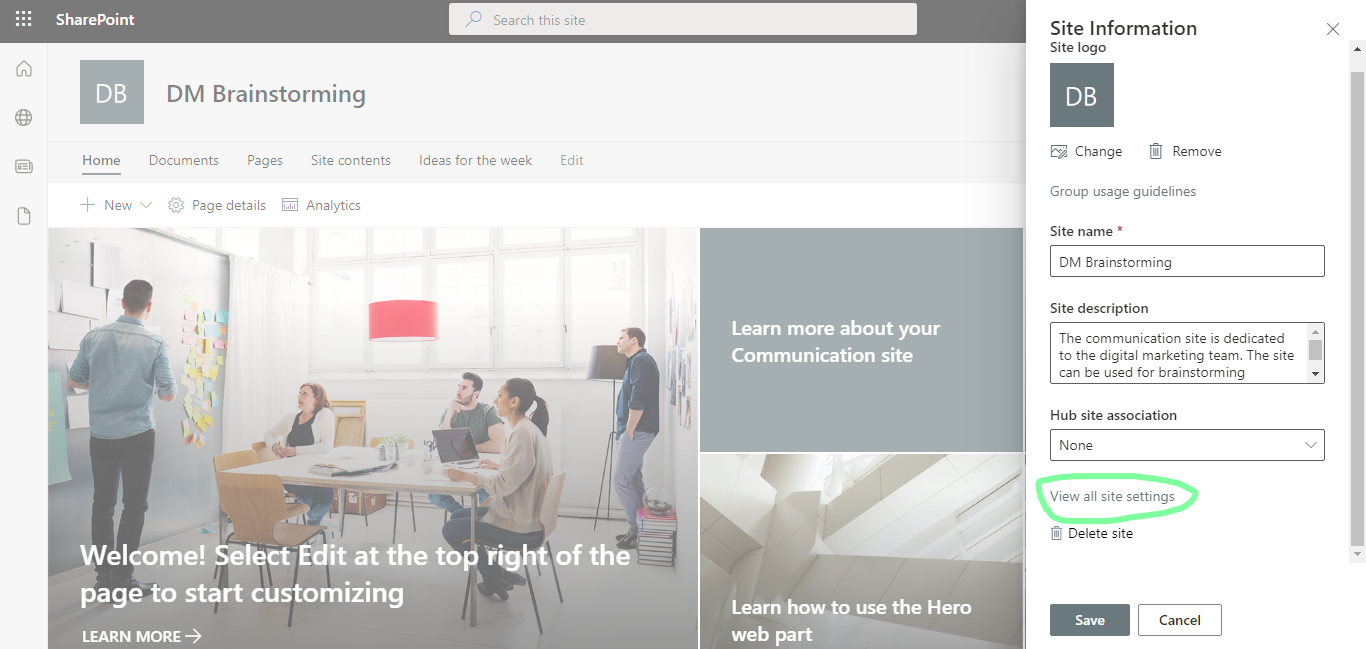
- Choose View all settings to go to Site settings
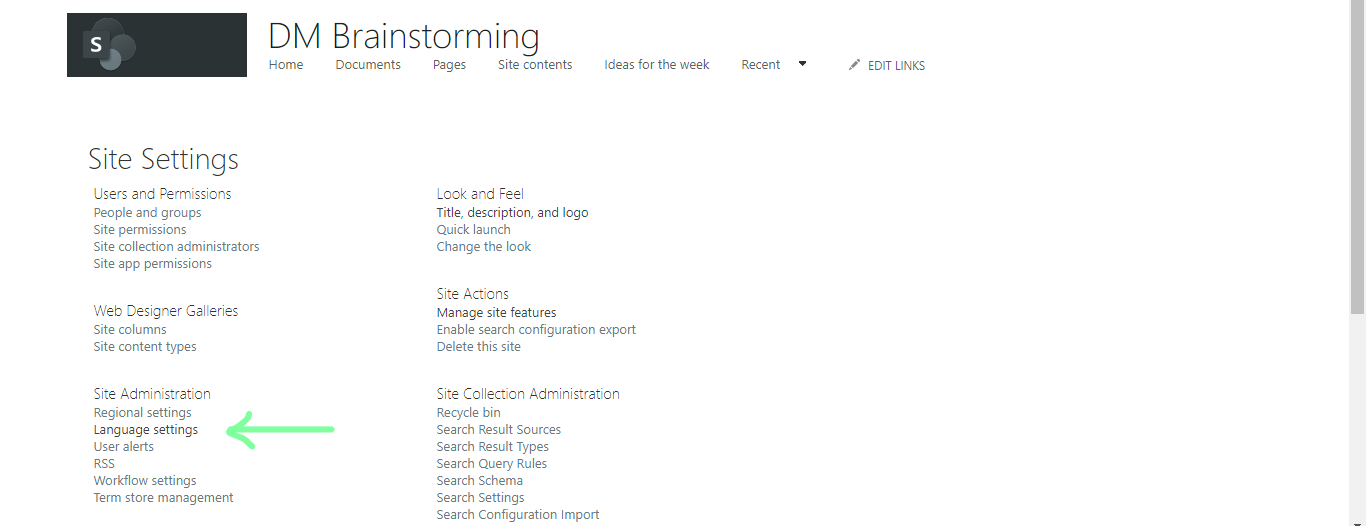
- From the Site administration section, click Language settings
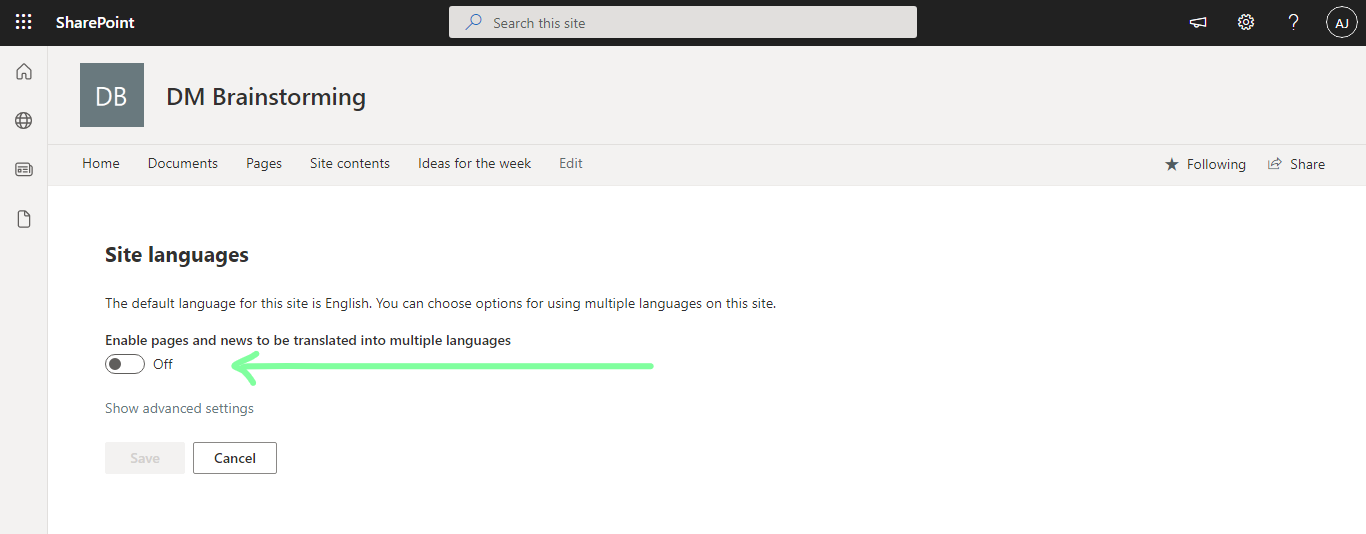
- The site languages page will open
- Toggle Enable pages and news to be translated into multiple languages to the On position
- Select the preferred languages from the drop-down that appears
- We are choosing French here
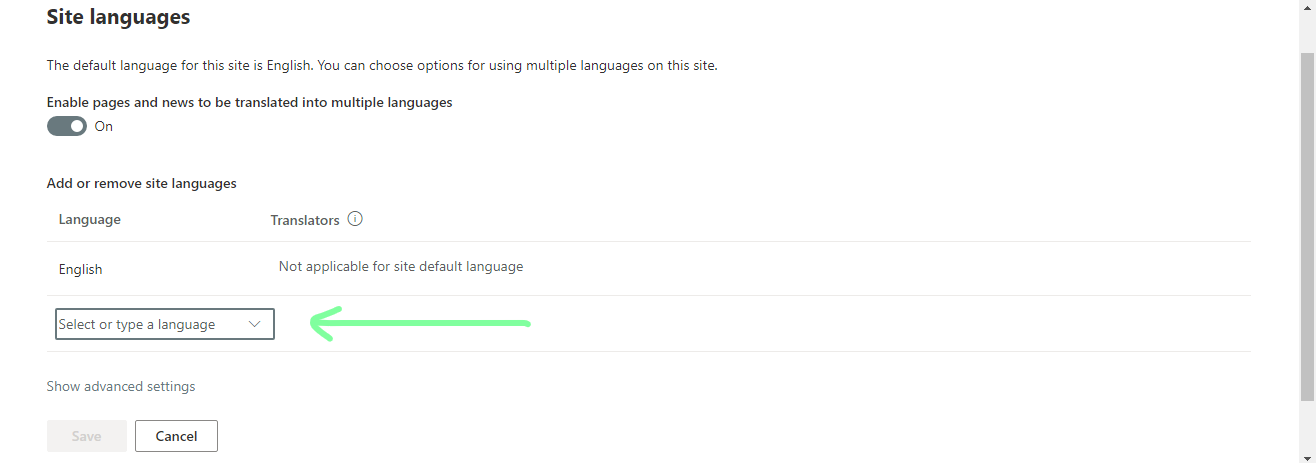
- You can also assign a user as a Translator in the space next to the added language
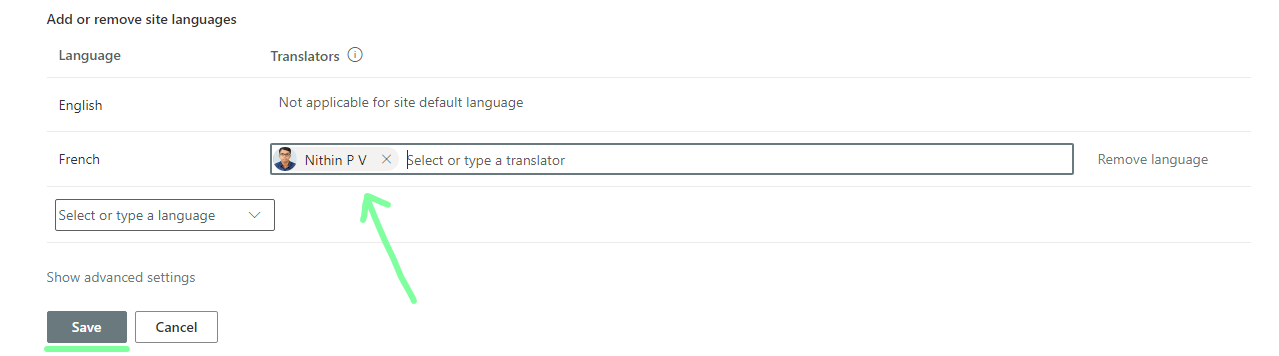
- Click Save
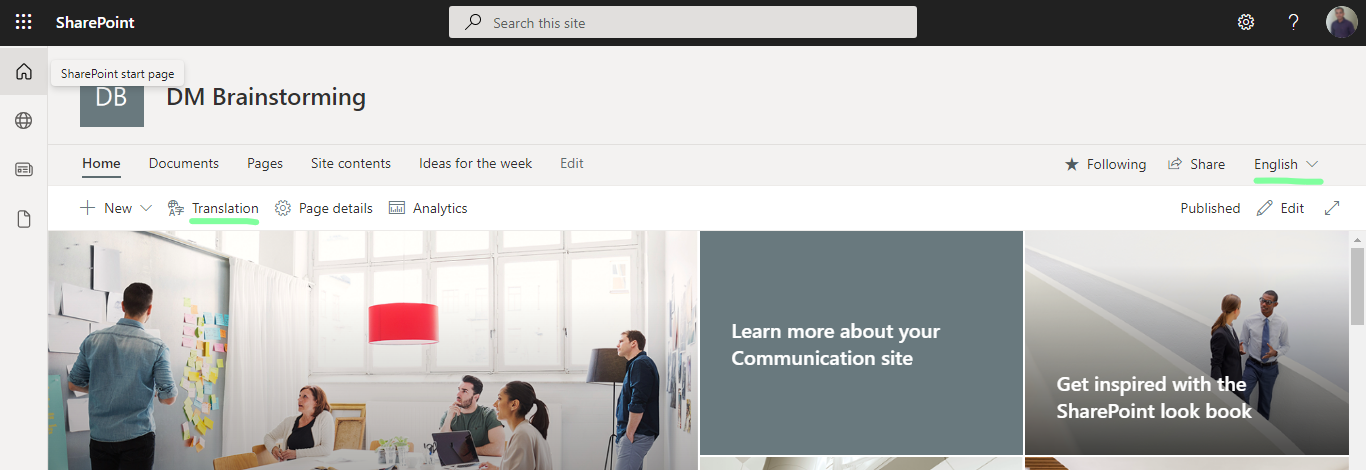
- Now you can navigate to the site pages, where the option for Translation with an associated language drop-down menu is available
How To Create a Page for a Specific Language
Now that you have added a new language to your page and have assigned a user to translate the page, we are going to demonstrate how to create a multilingual site in SharePoint online.
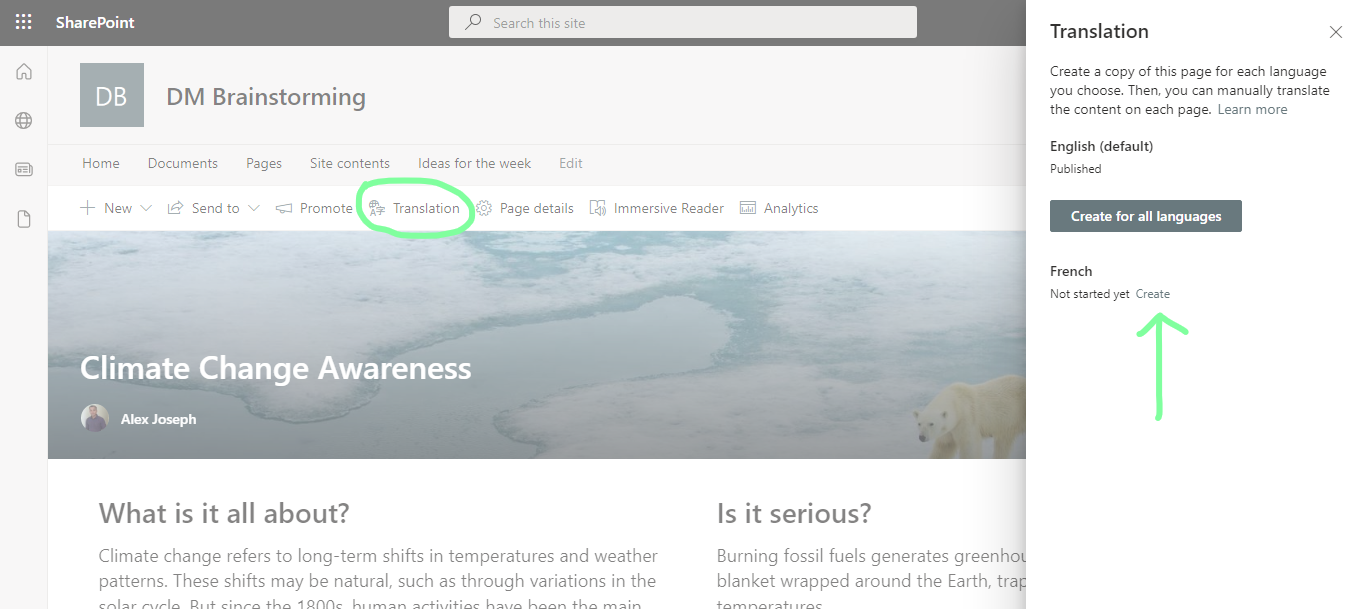
- Go to the news post or page you wish to translate to a new language
- Click Translation
- A Translation pane will open on the right side of the page
- Click Create next to the language you added
- It is French in this example
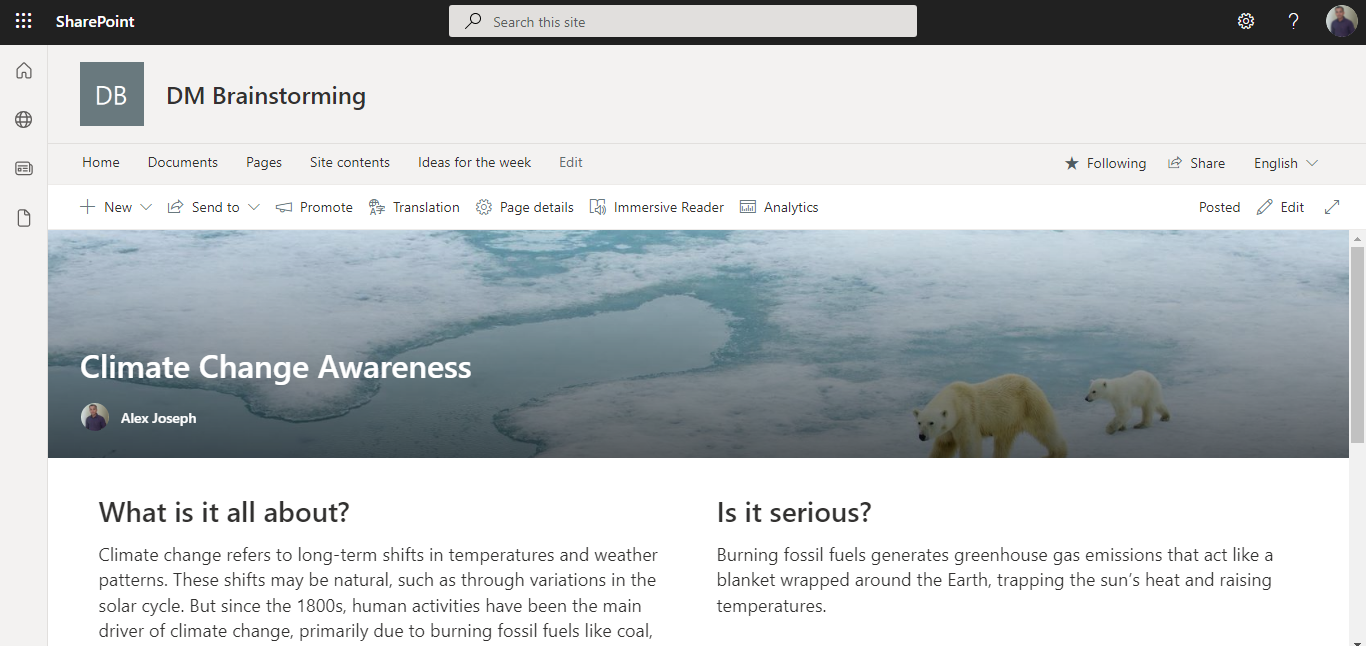
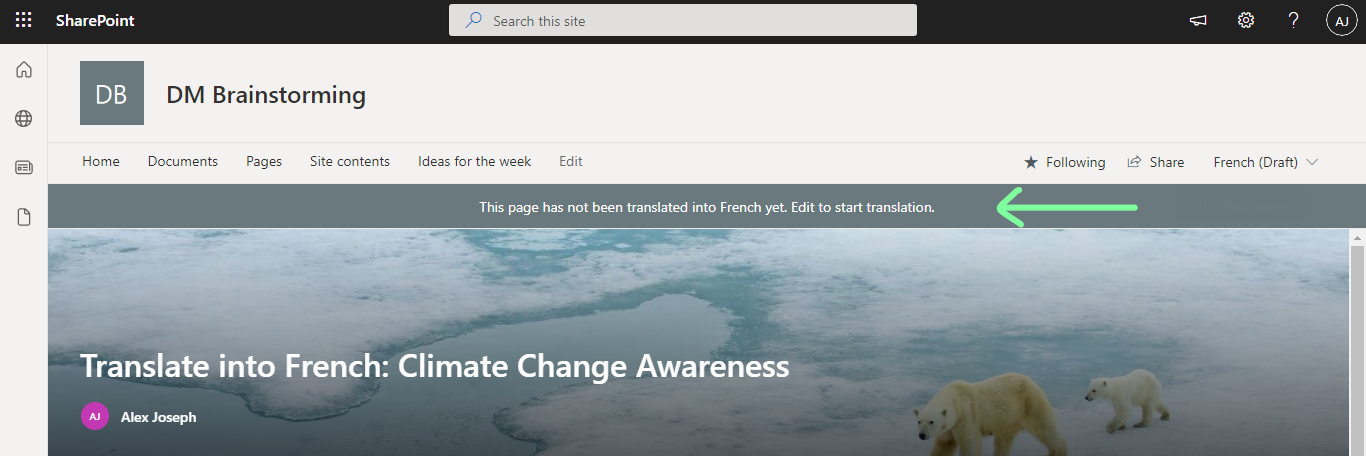
- A new page for the French version will be created, and a translation request will be sent to the translator, along with links to the default page and the French page created
- The translation request email will look like the following:

How The Translation Process Works
- The translator can proceed with the translation process once they receive the translation request email
- The translator can click the Start translating button redirect to the page and start translating its content
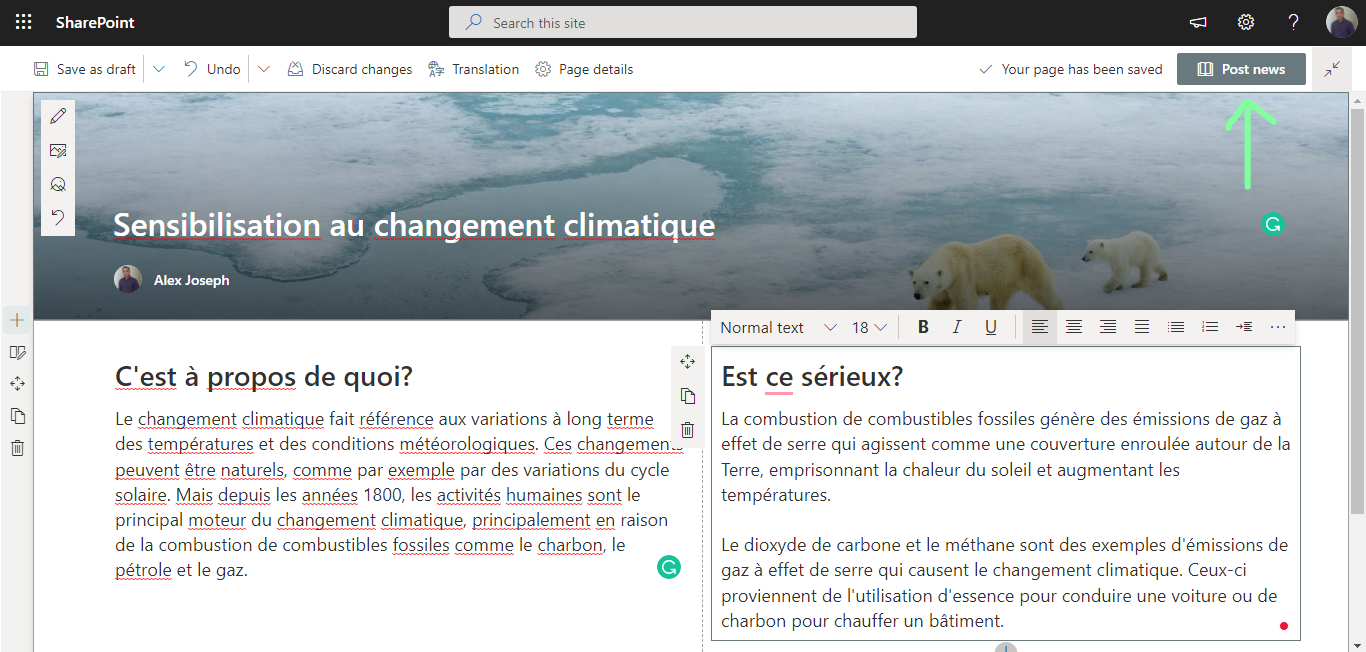
- Click Edit to get started with the content editing process
- Update the title and page content with the specified language translations and click Post news or Update
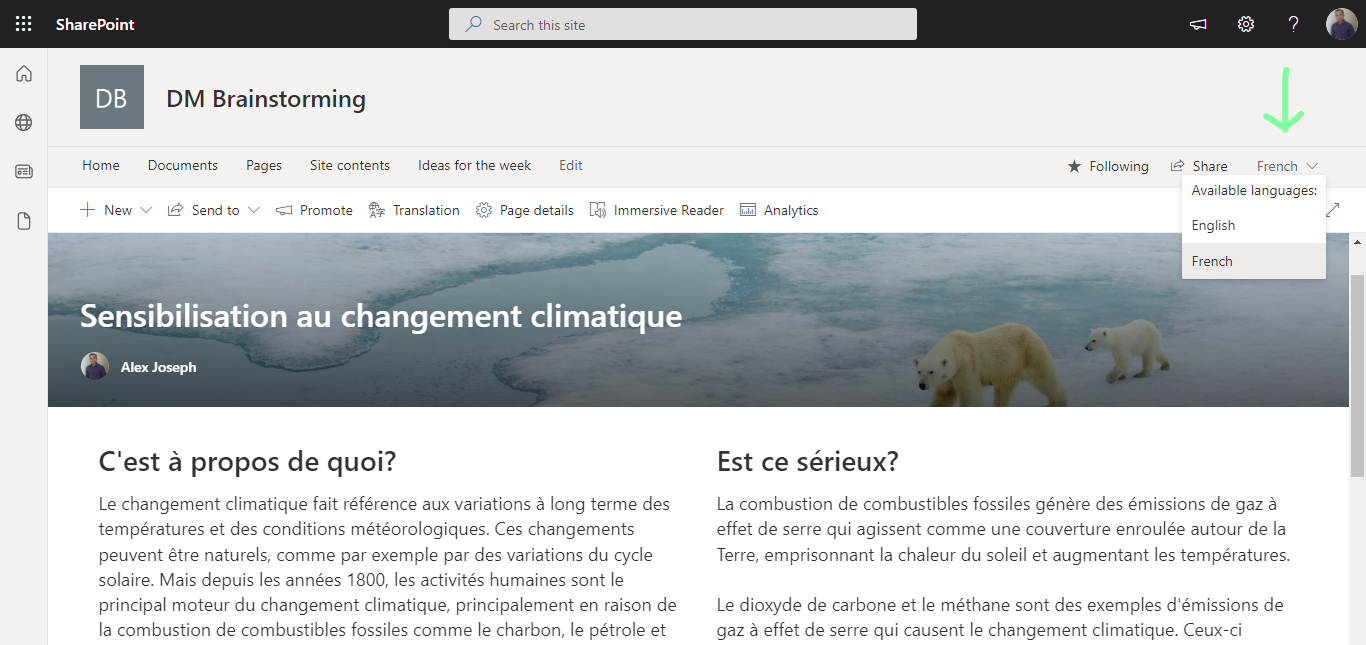
- You will see that the Available languages dropdown is now showing English (default language) and French
How To Configure the Multilingual SharePoint Online Site Name, Navigation, and Footer
Similarly, you can also update the translations for site name, navigation, and footer. Here is how.
- Click Settings and choose Site information
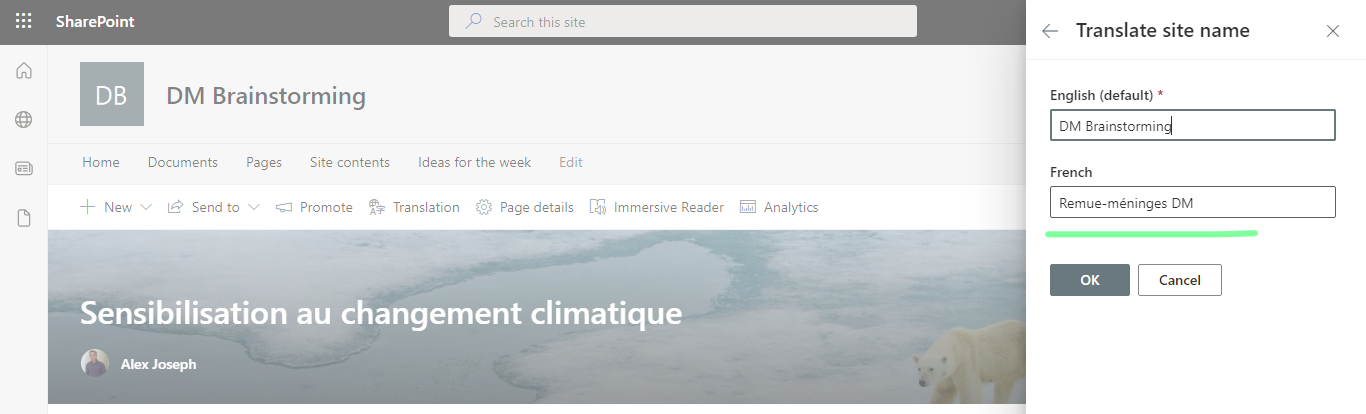
- Under Site name, click Translate site name
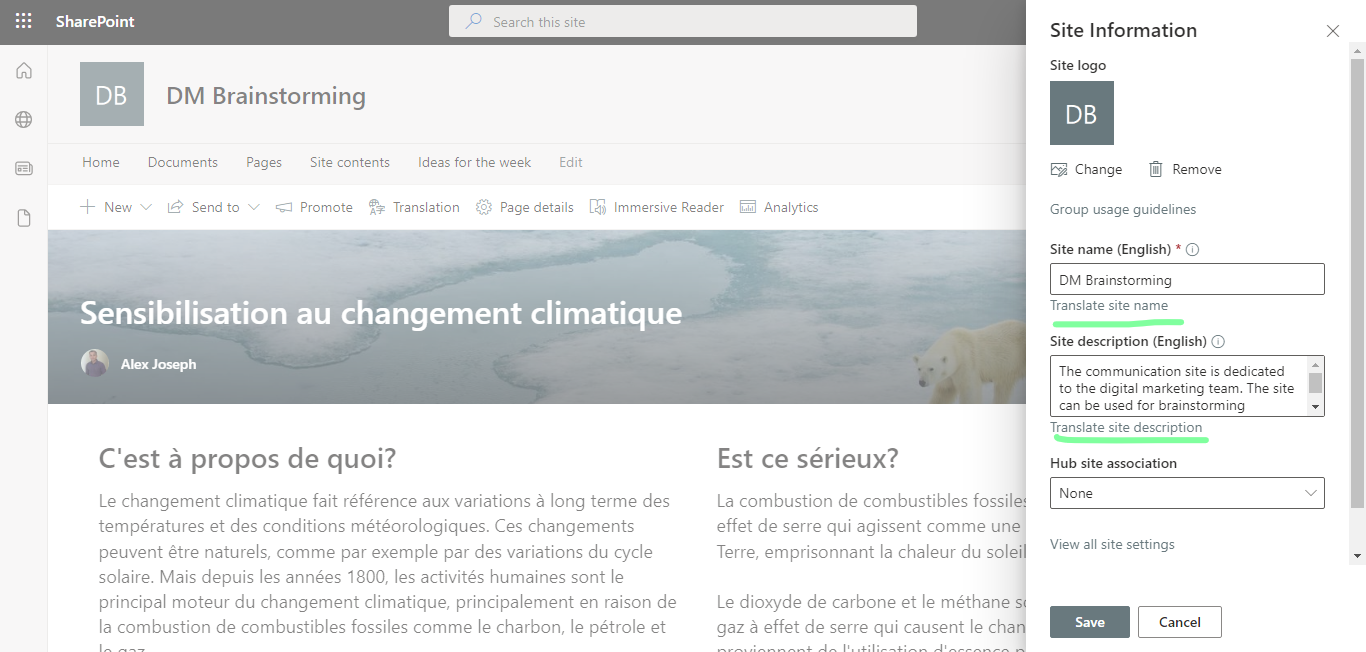
- In the next window, update the French translation of the site name and click OK
- You can do the same for translating the site description
- Click Save
- To update the menu options the same way, click Edit next to the menu options
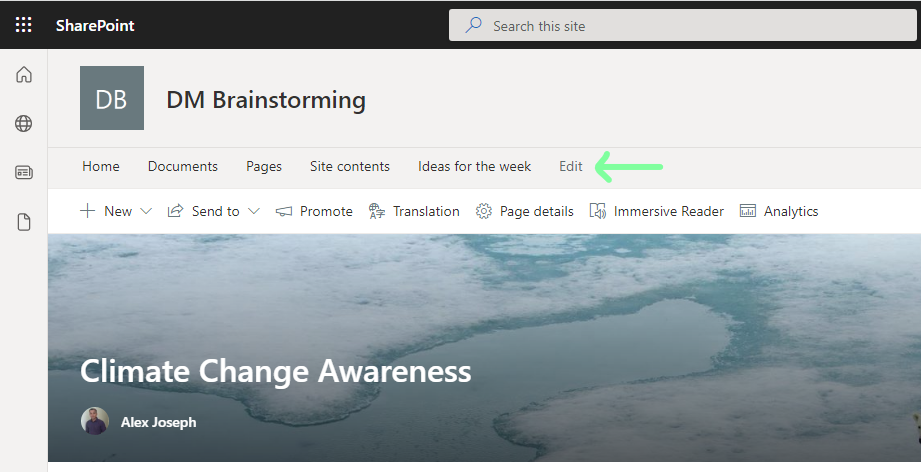
- Click the ellipses next to the menu options and choose Edit

- From the pop-up window that opens, click Translations under the Display name
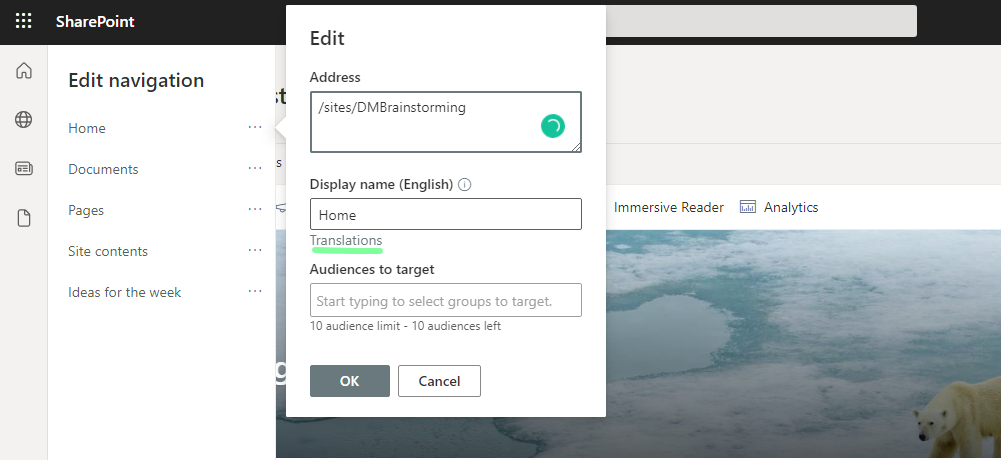
- Update the content in the next window and click OK
- Do the same for all menu options and click Save
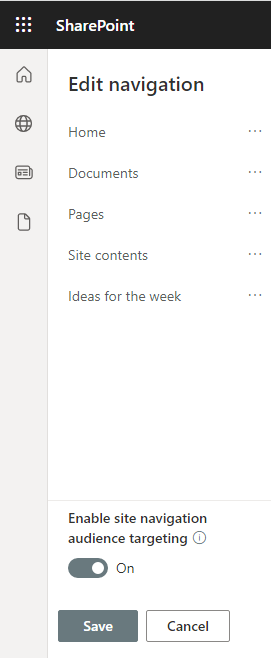
- The footer items can also be updated in the same manner
Things To Keep in Mind with SharePoint Translation Services
You can also edit the translated versions of a page if required. Here is how.
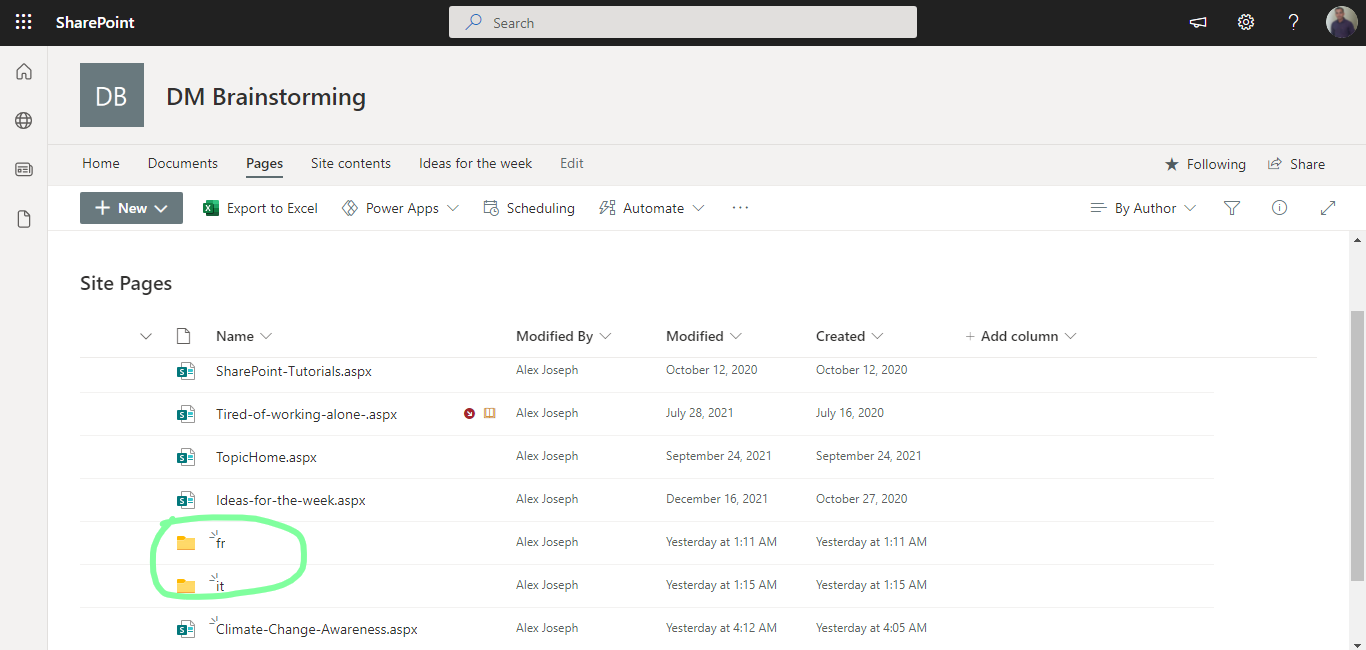
- Go to the Site contents page and choose Site pages
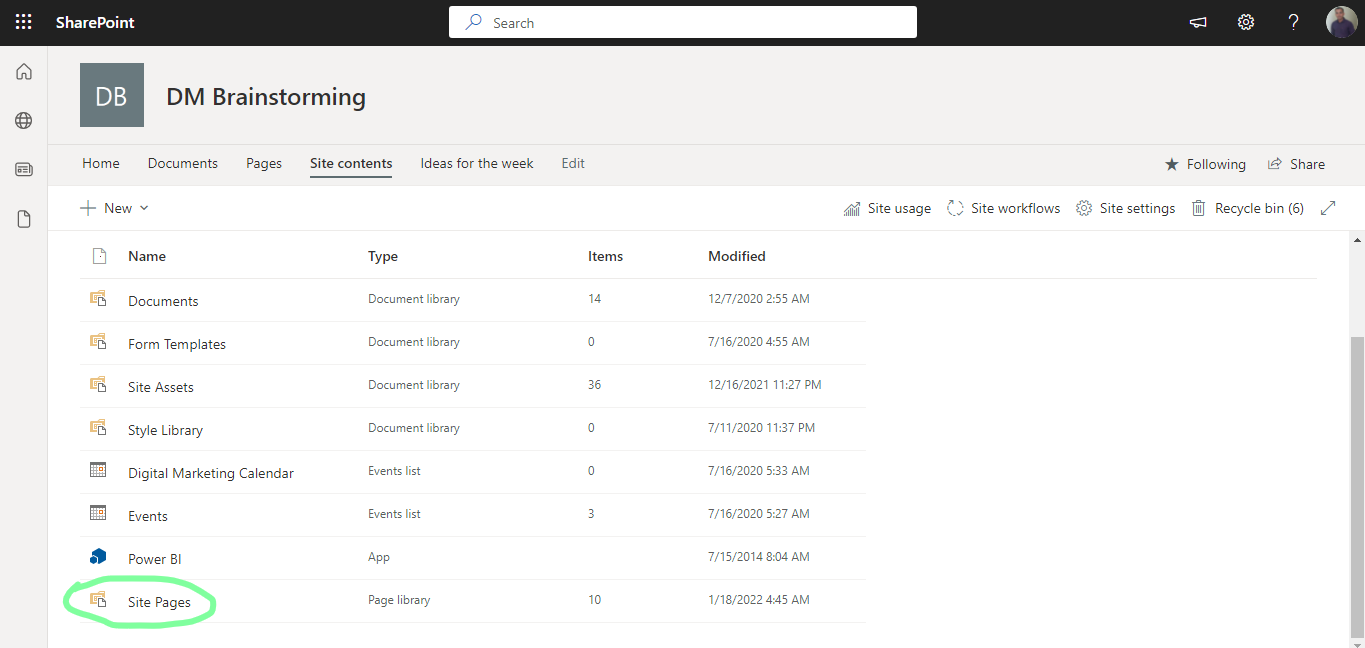
- The language page versions will be saved in folders of the specific pages
- Short names will be used for each language
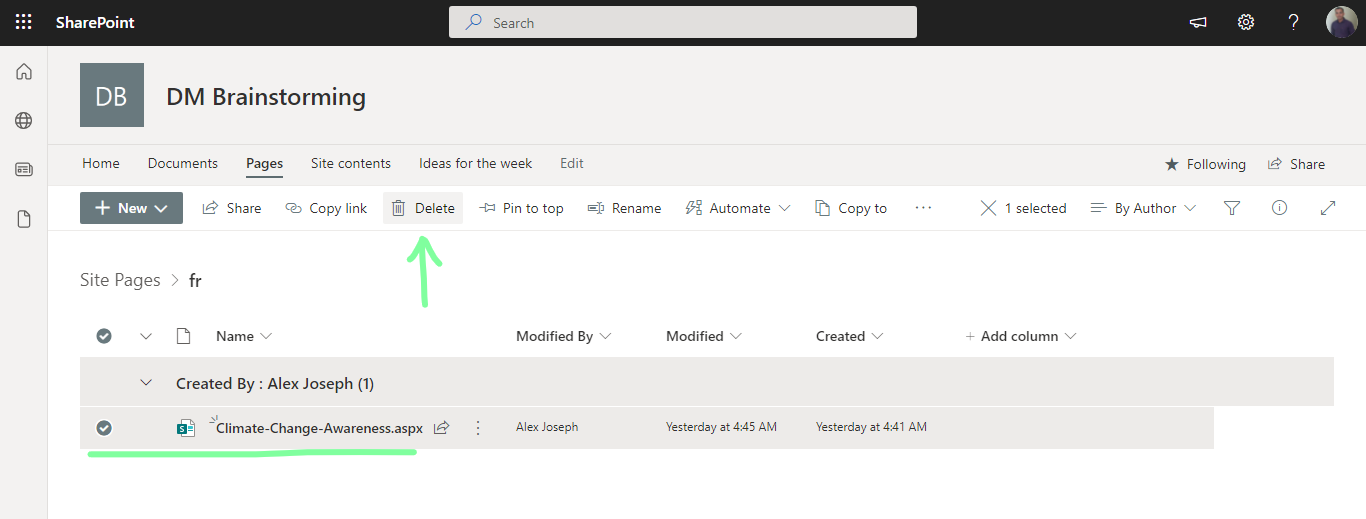
- Our French translated page is stored in the folder "fr"
- Go to the folder, select the page, and click Delete at the top menu or by clicking the ellipses next to the file name
Additional Facts: SharePoint Translation Features
- As of now, the page translation feature is only available on communication sites
- Translations can only be configured manually
- Once the page is translated from the translation request, it will automatically be made available to the users who prefer that language
- Personal language and region settings are considered when a displayed language is chosen
- The site name, time, and navigation are shown per the user’s language preferences
- When you choose a language to be displayed from the dropdown, that preference will last for only that browser session, and it applies to all pages on that site

Book a Live demo
Schedule a live demo of Dock 365's Contract Management Software now.