
Productivity is essential to the success of any business or organization. With specialized Microsoft 365 software solutions, your organization can easily enhance productivity and efficiency.
Microsoft Power Automate is a unique application provided in the Microsoft 365 set of solutions. Power Automate helps you automate those repetitive, time-consuming, and boring tasks. This gives you more time and resources to focus on critical business processes play a direct role in productivity.
If you are just getting started with Power Automate or are not a Power Automate expert, this blog post will change your approach towards the application in the next 10 minutes of reading.
Among the new Power Automate features, we found a few that are exceptional, yet not widely explored. Here are the hidden gems in this Microsoft 365 application that you should know. With these features, you can change the way you automate your business processes.
Content-
- Power Automate Flows
- Quickstart with Flow Templates
- The Flow Creation Experience
- Triggers and Connectors
- Rename Actions According to Intent
- Add comments to actions
- Copy and reuse actions
- Organize your flows using Scope
- Data operations
- Configure run after facility
1. Power Automate Flows
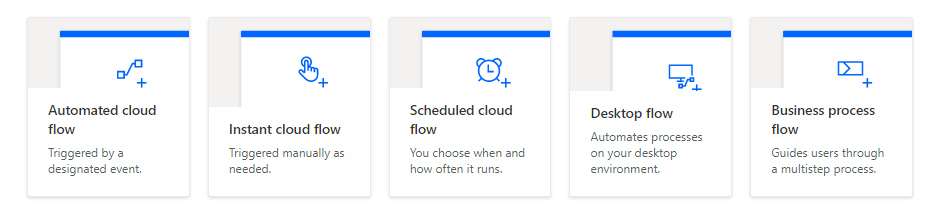
Creating flows is the basic process performed by Power Automate. To help you set up flows according to your requirements, the system offers you five types of flows to get started.
These flows include the following:
- Automated cloud flow
- Instant cloud flow
- Scheduled cloud flow
- Desktop flow
- Business Process flow
Our blog, What are the types of flows available in Power Automate gives you details about each flow type.
2. Quickstart with Flow Templates
The best thing about creating flows in Power Automate is the template library. Even for a beginner flow creator, templates make the process fast and efficient. When you click Create, you will be taken to a page that provides three ways to get started with flows.
Here are three methods to start a flow:
- Start from blank
- Start from a template
- Start from a connector
Start from templates is our favorite as it provides you a wide variety of templates in categories like Approval, Remote work, Notifications, Email, and more.
3. The Flow Creation Experience
The Flow creation experience is simple, yet equipped with many connectors, triggers, and advanced options. You might be a tad confused at the beginning, but here is a simple tip so you can get started with ease.
- Click Create from the Power Automate home page and choose an option from Start from blank section
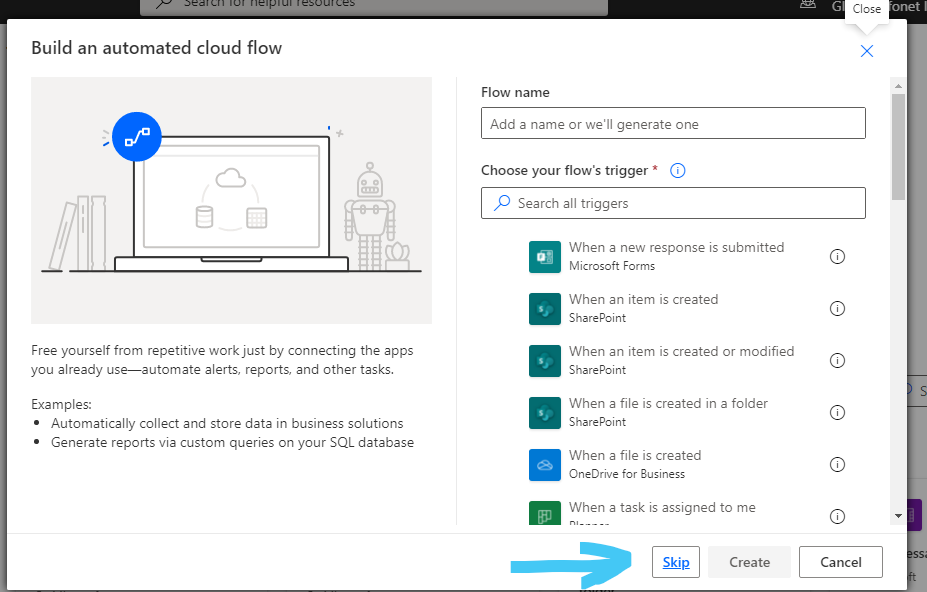
- From the window that appears, click Skip at the bottom if you are unsure which trigger to start with
- You will be taken to the Flow creation experience right away.
- You can now search for the connector associated with the service that you would like to connect or make a trigger action

4. Triggers and Connectors
From the Flow creation experience, you can easily find connectors and triggers using the Search bar. If you wish to find all triggers for SharePoint, search for "SharePoint", click SharePoint from the list, and then you will be presented with all triggers available. Choose desired triggers or actions and move forward with creating your flow.
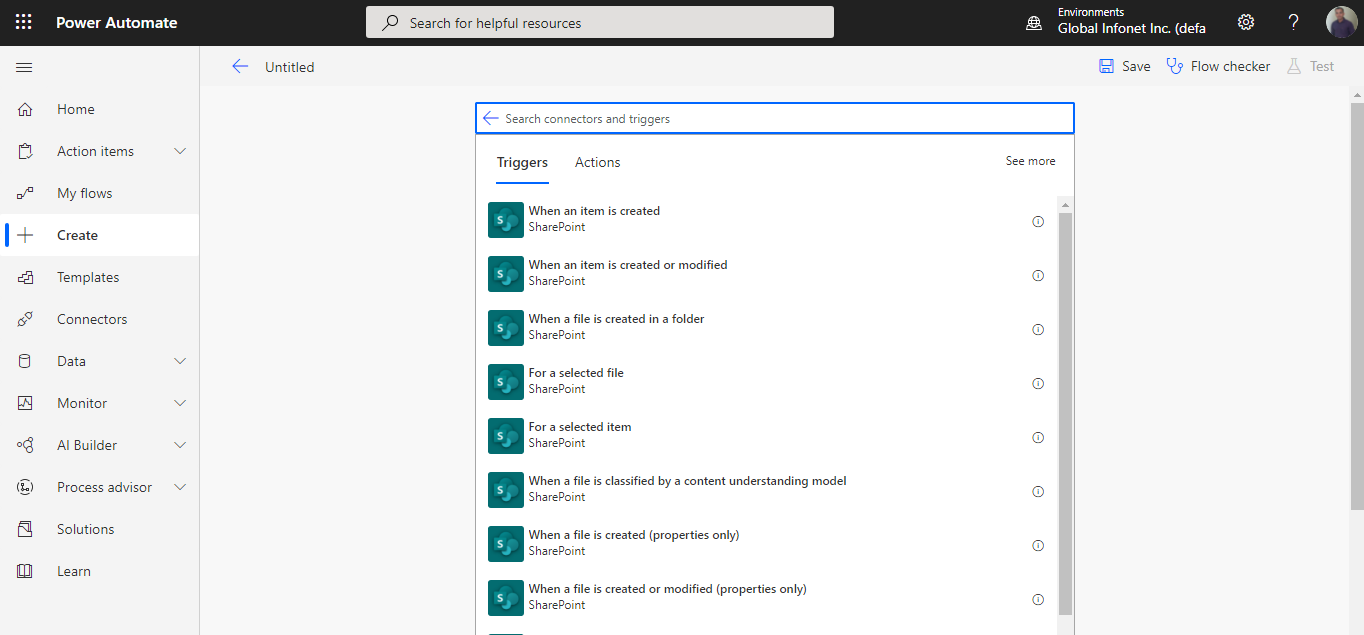
Types of connectors available include the following:
- Built-in
- Standard (connectors that are free to use)
- Premium (connectors that require a premium subscription to use)
- Custom (custom-made connectors for your organization)
5. Rename Actions According to Intent
It is easy to choose and configure actions inside a Flow. However, when you are creating Flows for long-term use, it is best to rename those actions in a way that describes their intent. By doing so, if you were to switch departments or even leave your company, then those working with these Flows in the future will easily understand their function.

6. Add comments to actions
Power Automate helps you to accomplish tasks quickly with minimal supervision. When using this feature, you will likely create hundreds of flows with many triggers and actions. These flows are designed to exist and be fully operable for several years. Even if you were to move to another project or an entirely different company in the future, it’s important to ensure that the users that will take your place have a proper understanding of how flows work.
This is why adding notes to actions is significant. By adding notes to actions, you can describe the purpose of the action.
Complete the following steps to add notes to actions:
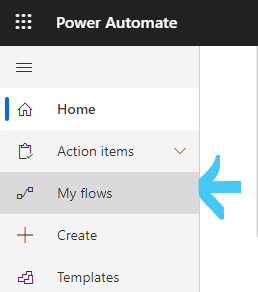
- From your Power Automate platform, click My flows on the left sidebar.
- Choose the flow you want to edit, then click the edit icon.
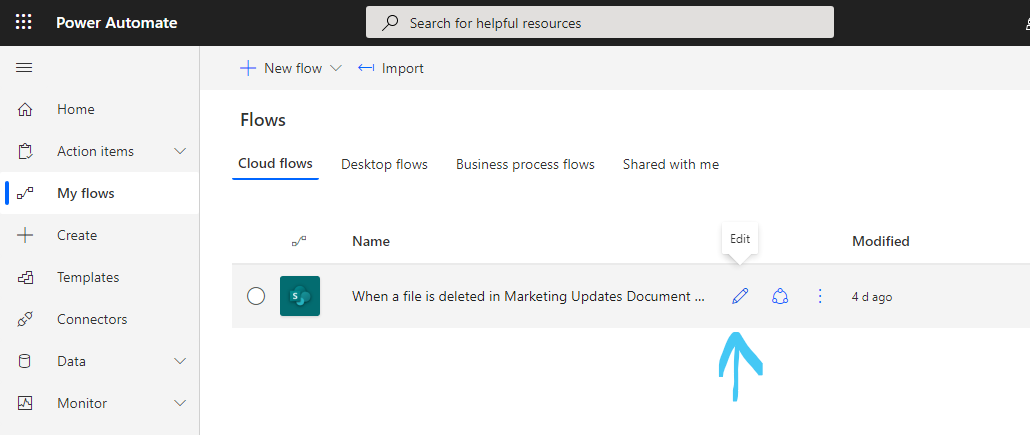
- In the edit mode, click the ellipses at the end of the desired action.
- Choose Add note or Edit note and enter a description to define the purpose of the action.
- Click Save at the bottom.
7. Copy and reuse actions
We all hate repeating the same steps over and over. It doesn’t matter if it’s a minor daily task, a document management activity, or a flow configuration – it’s simply unenjoyable.
While templates help you to get started with Power Automate flows instantly, are they enough? Your unique requirements will still leave you creating similar actions and steps many times more. You can skip all extra steps by using the option to copy action and reuse it as needed.
Complete the following steps to use this feature:
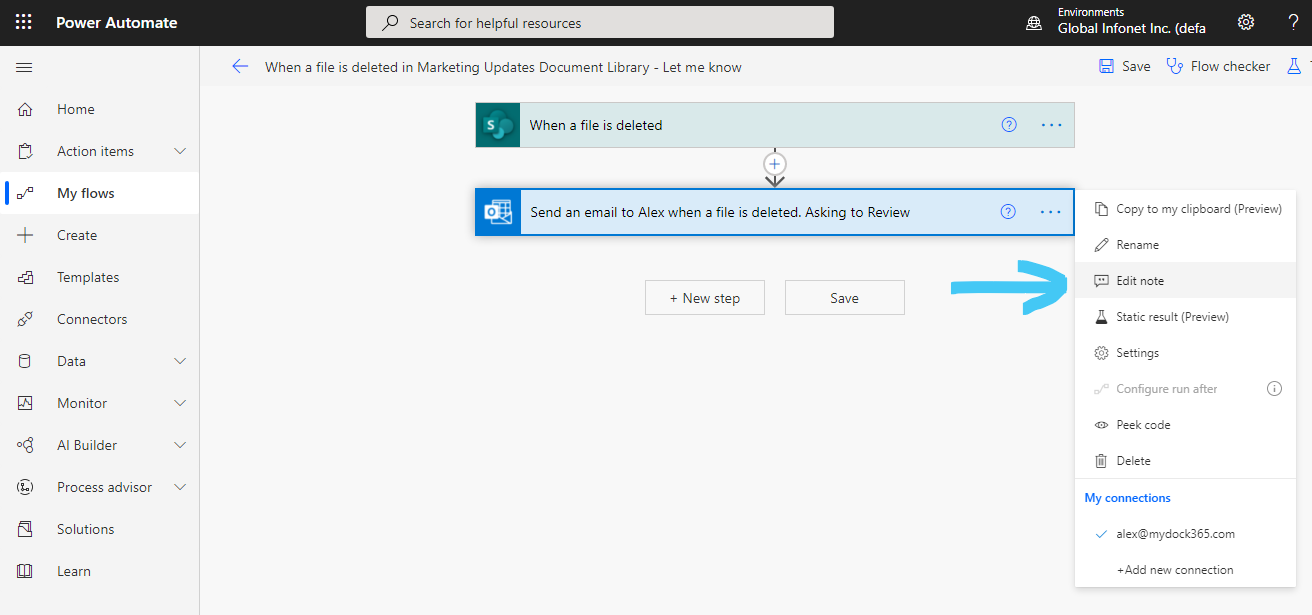
- Go to your flow and click the edit icon.
- Choose the action or step you wish to copy and click on the ellipses at the end.
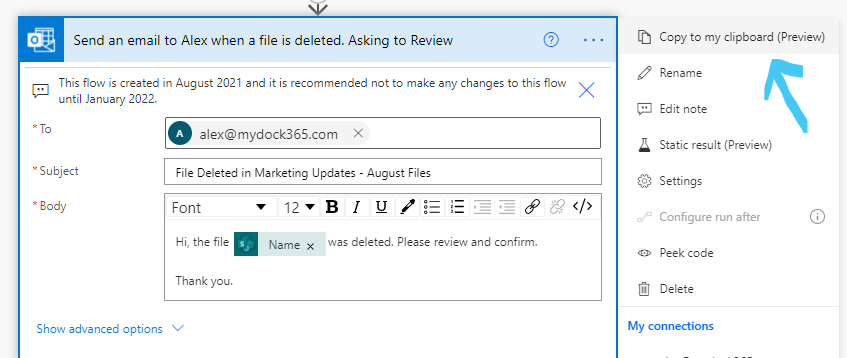
- Choose Copy to my clipboard.
- Click New step at the bottom or the + icon in-between actions to create a new action.
- From the new section, choose My clipboard and select the desired action you have added to the clipboard earlier.

- Make necessary edits and complete the flow.
8. Organize your flows using Scope
While working with large flows, it can be tough to organize multiple actions and find similar ones. However, there is a solution so that you can take control of large flows with plenty of actions. To do so, you simply need to create a scope and organize actions based on their characteristics inside each scope. You can even place a scope inside another scope. Here is how you can do this:
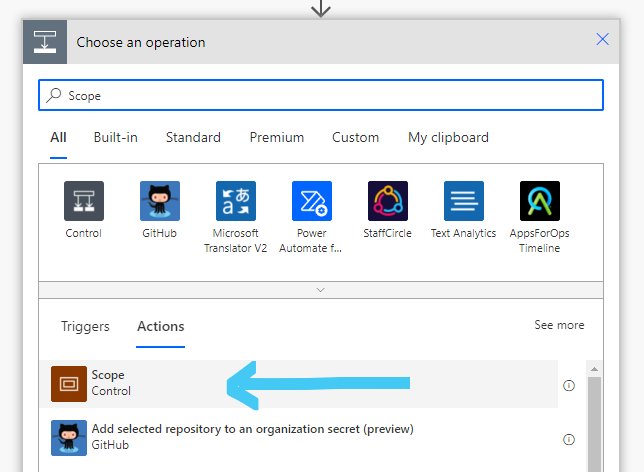
- Go to your flow and click New step.
- Search for Scope and choose it from the list of actions below.
- You can either create a scope first, or add similar actions to it.
- Another method is to drag and drop actions to suitable scopes.
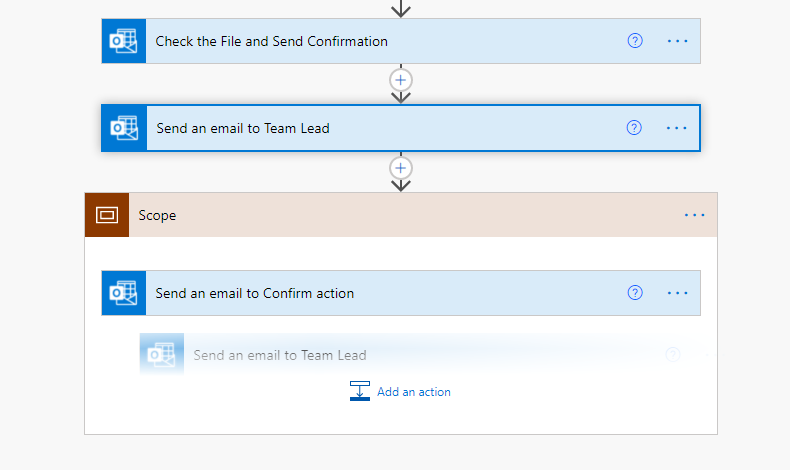
Create scopes to group your actions appropriately.
9. Data operations
Data operations are very powerful actions that are available in Power Automate. You can use these actions to manipulate data with the help of flows. Compose, Create CSV table, Create HTML table, Filter array, Join, Parse JSON, and Select are the available options.
- Search for Data Operations in the Choose an operation window.
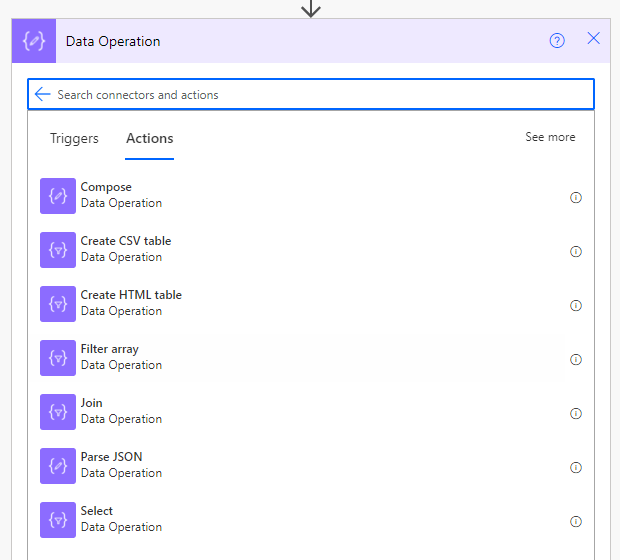
- Choose the one you require.
10. Configure run after facility
Another hidden gem feature in Power Automate is the Configure run after facility. Every action is processed assuming that the previous action is successful. What if the previous action failed or timed out? This is where the Configure run after facility becomes relevant. You can define at what circumstance a particular action should be processed.
To set up the Configure run after feature, follow the steps below:
- Go to the desired flow.
- Click on the ellipses and choose Configure run after.
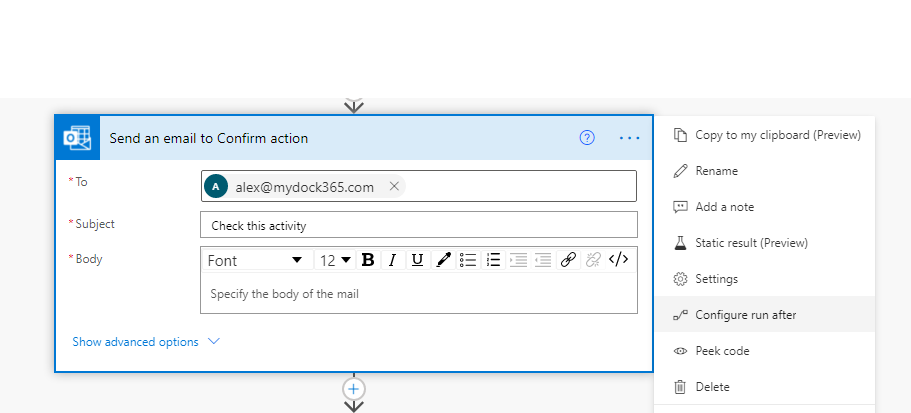
- Choose the desired option and click Done.

- Save the flow after configuring the feature for other actions as required.
These are the hidden gem features of Power Automate that we encourage you to start exploring. Start using these features and let us know about your experience.

Book a Live demo
Schedule a live demo of Dock 365's Contract Management Software now.


(1).webp)