
Web parts provide users the ability to add functionalities and features to their modern SharePoint pages. There are many web parts available in SharePoint that allow users to complete a wide variety of tasks directly from the page. In this blog, we'll talk about the Quick Links web part. As the name denotes, this web part helps you showcase your most frequently used documents and items in an easily accessible section. Now let’s see how to use the Quick Links web part in SharePoint Online.
What can you do with the Quick Links web part?
You will have a long list of SharePoint pages in your organization, each one assigned with different tasks. The Quick Links web part allows users to easily access and navigate to items they frequently use (i.e., documents, files, associated items), which can be a huge time-saver.
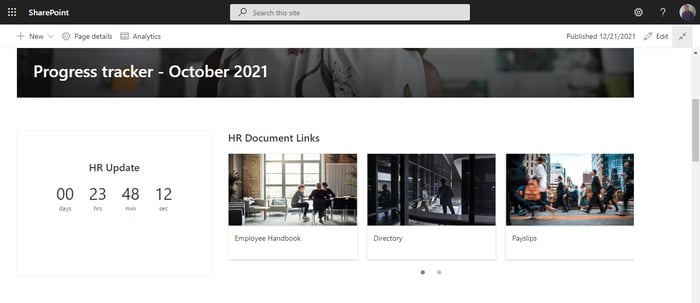
For example, if you are a member of your organization's HR department, the Quick Links web part can assist you in keeping links to the employee directory, handbook, and other HR-related documents in an easily accessible place. Consider what Quick Links your team might benefit from having readily available to complete certain tasks.
How to Add the Quick Links web part to a SharePoint Page
First, ensure your SharePoint page is in Edit mode. Now, complete the following steps:
- Go to the SharePoint page that you'd like to add the Quick Links web part to
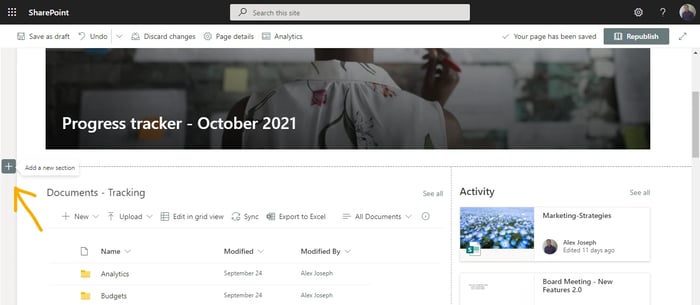
- Click Edit on the top right corner of the page
- Click the + icon next to any existing section to add a new section for the Quick Links web part
- Customize the layout, by number of columns of by dividing the space according to a ratio
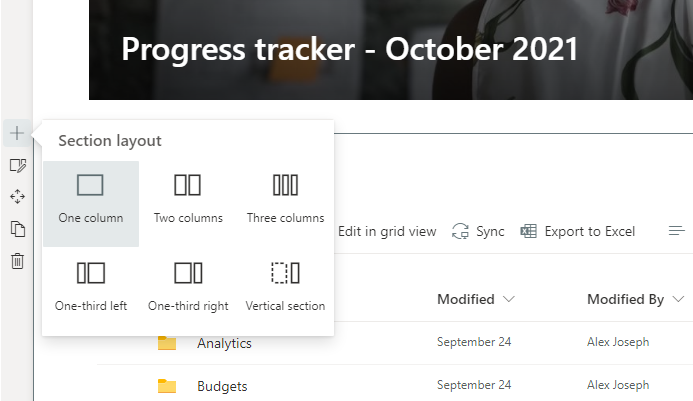
- In this example, we have selected a One-third left section layout
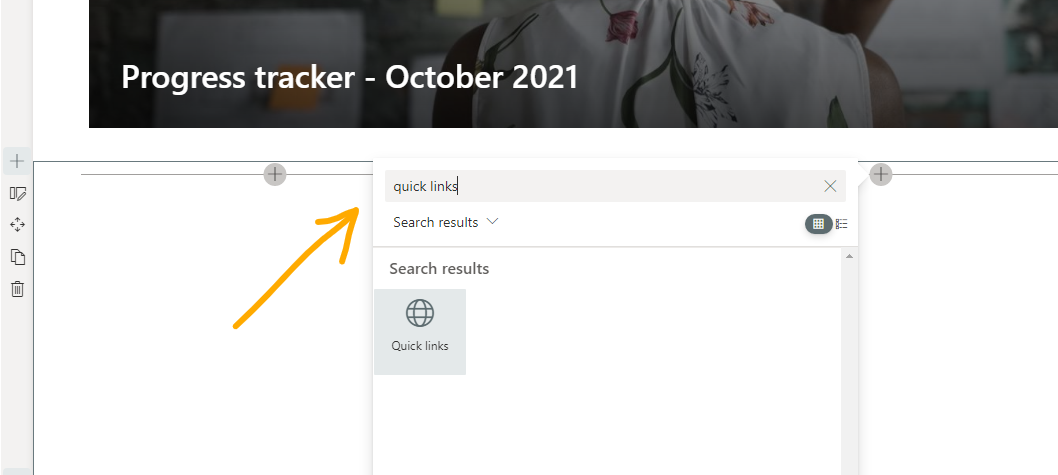
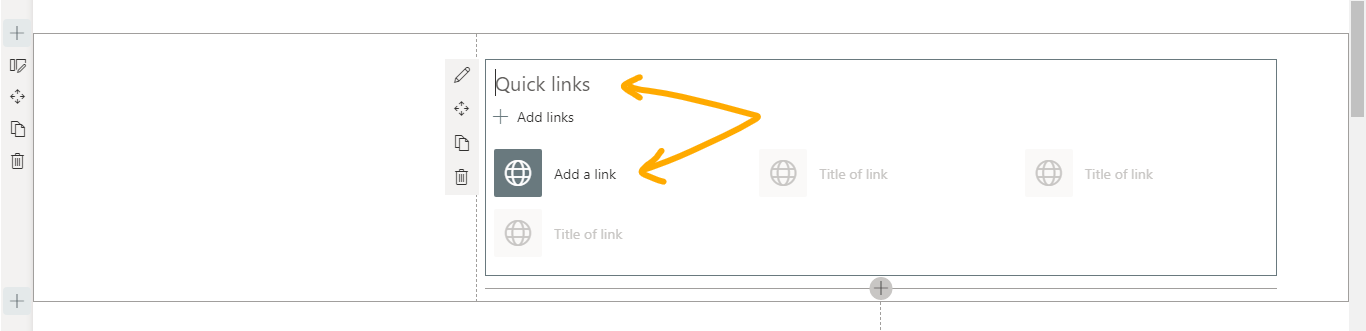
- Click the + icon inside the desired column of the new section (you can choose an existing section if you wish) and search Quick links in the web parts selection box that appears

- Choose the Quick links web part option
- The web part will now be added to the desired section of the page
- Enter a new title for the Quick links section and click Add link to add your Quick link items
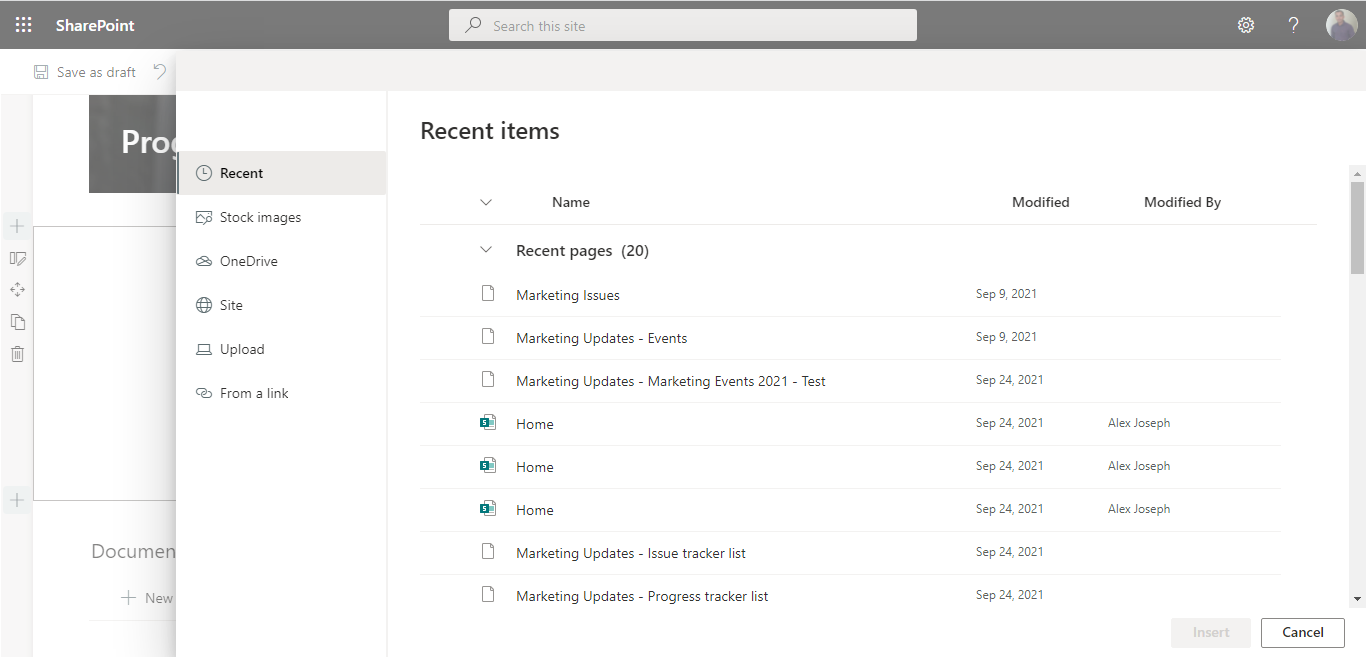
- When you click Add link, you will be presented with a new window that allows you to pick the desired option from the following list:
- Recent
- Stock Images
- OneDrive
- Site
- Upload
- From a link
- The desired items will now be added to the Quick links web part
- In this example, we added a count-down timer next to the Quick links web part
- Click Republish to take your page live
How To Edit Links and Items in the Quick Links web part
Complete the following steps to edit a link or item in your SharePoint Quick Links web part.
- Configure your page to Edit mode
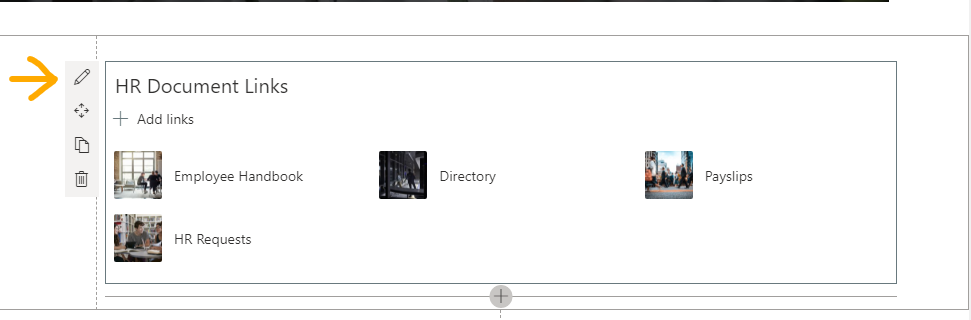
- Hover over the desired item inside the web part and click on the pen icon to edit details
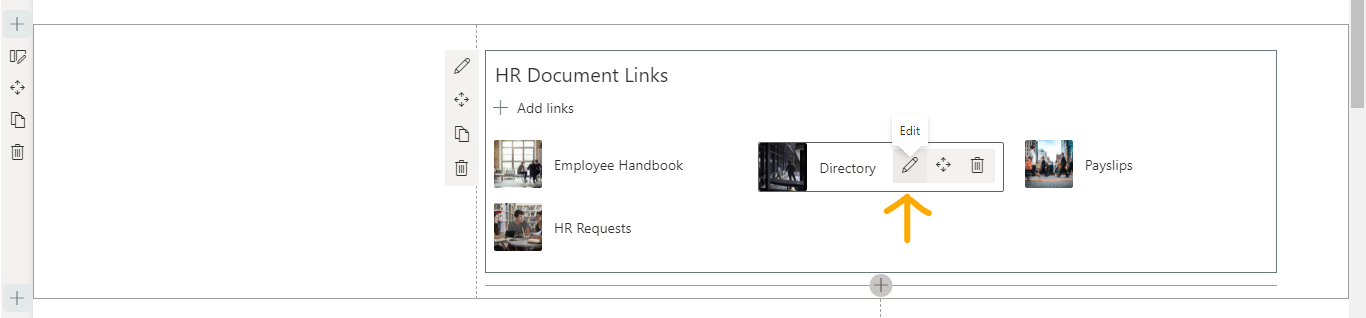
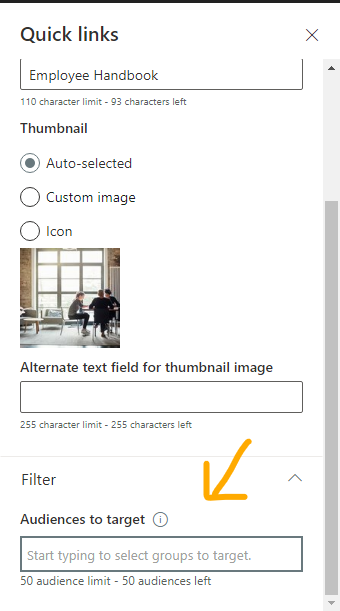
- You can change the title of the link, thumbnail, and the link itself if required
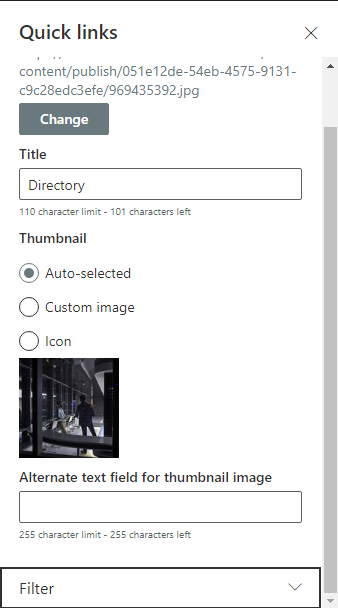
- Save your changes and republish the page when complete
How To Configure the Quick Links web part for Audience Targeting and Layout
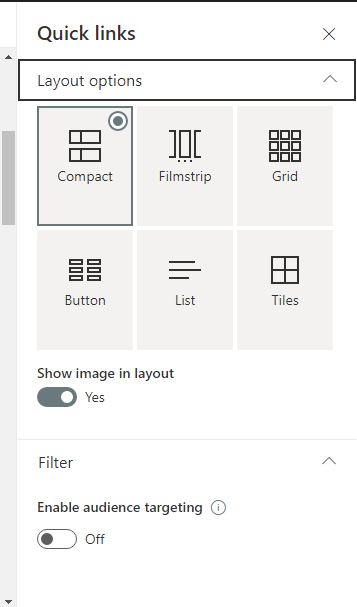
- Click the pen icon next to the web part’s top left corner
- From here, select your desired layout from options including compact, filmstrip, grid, button, list, and tiles
- In this example, we will select the filmstrip layout
- You can also choose whether to show images in the layout, you can also toggle the Audience targeting option located at the bottom
- Once the Audience targeting feature is enabled, you can configure this option in the filter section of each item’s settings
- Enter a group name in the provided space to target
- Once you have made all changes, save your changes and republish the page
Using this feature can be remarkably simple. We recommend experimenting with this feature until you find the right template and configuration for your needs and goals. If you try this web part, let us know more about your experience in the comments below.
Book a Live demo
Schedule a live demo of Dock 365's Contract Management Software now.