
Sharing content and resources with people is an important capability every organization needs to have, organizations often adopt the services of a DMS to manage their documents. Uninterrupted sharing and collaboration can assure outstanding productivity and efficient workflows. Microsoft SharePoint is loaded with plenty of sharing and collaboration features. Understanding how to share files between users with those features and knowing how to use them in each scenario is important to achieve good results. We are trying to present you with 5 best practices to Share Files and Folders with Unauthenticated Users in SharePoint. An effective DMS will be able to manage and control who sees what in an organizational environment.
Content-
- What is Unauthenticated Sharing and Why it Matters
- Set up an Expiration date for Anyone Links
- Configure Link Permissions
- Set up Default Link Type for your Organization
- Include Ownership Information with Files
- Turn on Safe Attachments Feature
What is Unauthenticated Sharing and Why it Matters
You will see different options when you try to configure organization-level sharing settings in Microsoft SharePoint. ‘Anyone links’ is one of the most popular and major options you find there. It is called unauthenticated sharing and it is found to be the easiest and convenient sharing option in multiple scenarios. One major factor that makes unauthenticated sharing easier than other sharing modes is that they do not require any authentication to open a link. Moreover, you can pass the link to anyone easily.
However, unauthenticated sharing may cause trouble if you are not allowing it without considering the type of content it is handling. Not all content in an organization can be allowed to share without proper authentication. You can set up a safe sharing environment for your organization, where users can utilize unauthenticated sharing for easy collaboration, at the same time keep your organization’s sensitive content safe. You know how to share files between users, but do you know how to do it safely? Let us unfold those 5 best practices to share files and folders with unauthenticated users.
1. Set up an Expiration date for Anyone Links
Setting up an expiration date for Anyone Links is the first point we are listing here. We usually store files in many locations such as sites, Teams, and Groups. There are also data retention policies set up when it is required to retain these files for longer periods. If those important files are shared with unauthenticated users, the chance for unanticipated changes and access will increase. Along with learning how to share SharePoint files with external users, you need to know how to do it appropriately. This might create confusion and problems. By configuring an expiration date for these Anyone Links you can avoid it to a great extent.
Here are the steps to set up the expiration date for Anyone links:
- Go to the SharePoint Online Admin Center
- From the left navigation, choose Sharing.
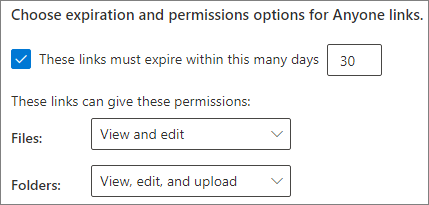
- Look for the Choose expiration and permissions options for Anyone links, choose the option These links must expire within this many days checkbox.
- Enter the preferred number of days in the box and click on Save.
2. Configure Link Permissions
Anyone links give permission for a user to view and edit a file, and if it is a folder, they can view files and edit it as required. The user can also upload a new file to the folder. It is possible to change the permission to ‘view-only’. For files/folders individually. The best way to allow unauthenticated sharing, but still do not want those unauthenticated users to make changes to your files, you can change the permissions setting to just View.
Here are the steps to set the permissions to just View:
- Go to the SharePoint Online Admin Center.
- Choose Sharing from the left navigation.
- From the Advanced settings for ‘Anyone’ links, set the permission option you desire.
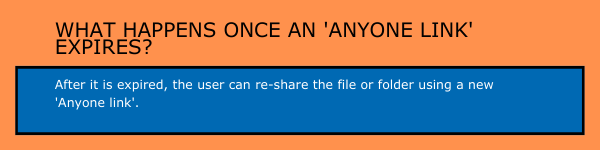
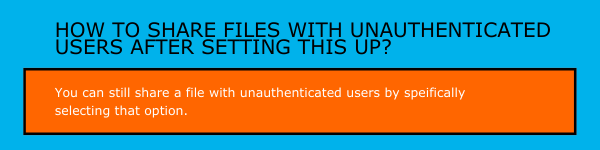
Even after setting this option, you can still give certain people the privilege to edit files using the ‘Specific people links’ option. The advantage is that these links ask people outside your organization to authenticate before making changes to the file. You can easily track guest activities too.
3. Set up Default Link Type for your Organization
For ‘Anyone’ sharing enabled organizations, the default sharing link will be set as Anyone. It is convenient in most cases, but there is a risk of unexpected changes as part of unauthenticated sharing. In case if a user forgets to change the link type while sharing the file, there is a chance for an accidental sharing link creation for that document which does not require authentication. To avoid that risk, you can set up the default sharing link type for your organization.
Here are the steps you need to follow:
- Go to the SharePoint admin center and choose Sharing from the left navigation.
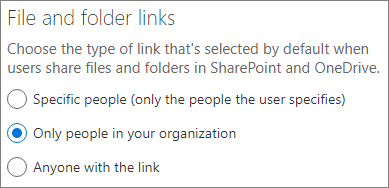
- From the File and folder links section and choose Only People in your organization.
- Click on Save.
4. Include Ownership Information with Files
Another best practice to share files and folders with unauthenticated users is to assure that the shared files contain copyright or ownership information. You can get this done by using sensitivity labels in the Microsoft 365 Compliance admin center. Configure the label appropriately to include a watermark or custom header or footer by default with your office documents.
Here are the steps to include ownership information with your office files:
- Go to Microsoft 365 Compliance Admin center.
- From the left navigation, click on Sensitivity labels, placed under Classification.
- Choose the label you wish to add as a label and click Edit label.
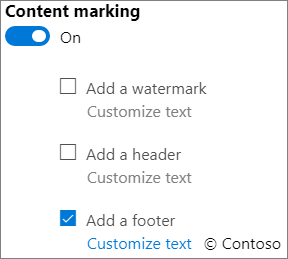
- Click on the Content marking tab and turn the content marking option On.
- Choose the type of text you wish to add to documents and select Customize text.
- Enter the text you wish to add to the documents and appropriate text options.
- Click on Save and Close options after making necessary changes.
Now that the content marking is enabled for the label, the text you entered will be included in every official document, when a user applies that label.
5. Turn on Safe Attachments Feature
When unauthenticated users can upload files, there is a risk of someone uploading malicious files to your system. The Safe Attachments in Microsoft 365 can help you avoid this threat. When it is turned on the files will be automatically scanned during upload and they will be quarantined if found unsafe.
Here is how you can turn on the Safe Attachments feature in Microsoft 365:
- Go to Microsoft 365 Security admin center.
- Click on Policies from the left navigation.
- From the Threat protection section click on ATP safe attachments (Office 365).
- Choose Turn on ATP for SharePoint, OneDrive, and Microsoft Teams checkbox.
- Click on Save.
By following all these steps, you can ensure that your office files and folders are safe even though unauthenticated sharing is still practiced in your organization. A DMS based on SharePoint can effectively reduce your document management worries and access control issues, SharePoint access control settings are widely accepted by organizations around the world.

Learn how to share SharePoint files with external users safely to make your workforce work exceptionally. If you have any queries, let us know in the comment section below.
Have a great day!
Book a Live demo
Schedule a live demo of Dock 365's Contract Management Software now.