It’s simple to customize SharePoint list forms in Microsoft PowerApps. We used to follow InfoPath forms to customize SharePoint list forms earlier that took hours and hours of work. Thanks to Microsoft PowerApps, now we can quickly develop dynamic apps.
Learn more about InstaExpense – PowerApp App for Finance
As you know Microsoft PowerApps is integrated with SharePoint i.e., you no longer need to install another application to your system. You're able to experience full-fledged custom forms without writing any codes! Once it is set, the forms get embedded with the SharePoint list and easily accessible to all the users.
Since SharePoint and PowerApps are integrated seamlessly, you won’t need to manage forms in two places. The user permissions are set from SharePoint and then you'll have access to analytics reports, connections to other data sources, conditional formatting and more.
The customize forms selection might not work properly, if the SharePoint list contains data types where PowerApps does not support. Click on PowerApps from your SharePoint list (on the ribbon) and select customize forms. This will redirect you to PowerApps Studio app in the browser.
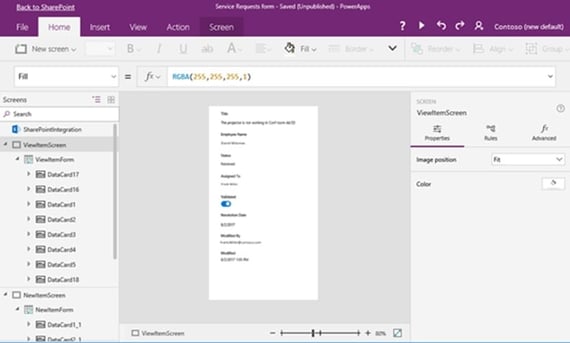
If you wish to get back to the SharePoint list. Just click on “Back to SharePoint” option at the upper-left corner area of Microsoft PowerApps Studio.
How to customize the list forms?
There’s couple of methods to customize your form such as formatting the text, changing size and orientation, adding rules, custom data validation, adding additional views, images or charts.
Let’s assume that the form has an AccountID field that needs to be hidden:
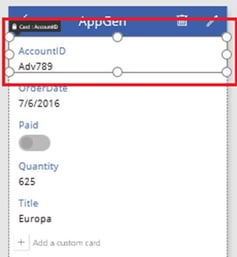
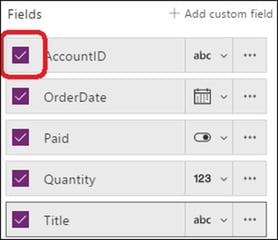
It is easy to hide a field in PowerApps. All you need to do it uncheck the AccountID field option in the form customization options.
For a complete list of resources, check out Microsoft PowerApps docs.
How to save and publish the list form back to your SharePoint:
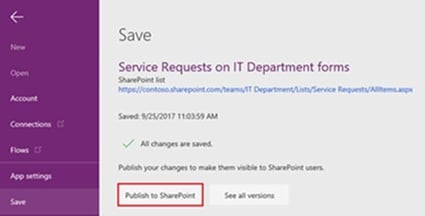
Click on file and save after working on the PowerApps module. This will save your PowerApps form app. However, this doesn’t publish the changes. To publish the changes, select Publish to SharePoint. Next, the form automatically receives permissions from the SharePoint lists.
Viewing list form in your SharePoint:
To check out the customized form, select Back to SharePoint. Choose any items from your SharePoint list. The form opens on the right-hand side of the browser window.
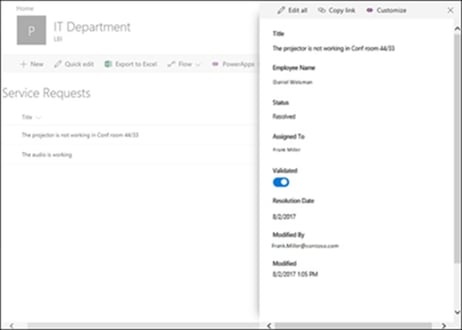
If you wish to customize your form more, select Customize option and work on your changes. Once done, save those changes so you don’t lose any of the information.
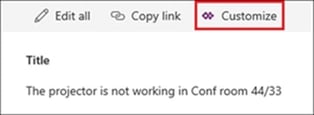
You can keep customizing your changes “n” number of times, but it won’t be visible in SharePoint without triggering the Publish to SharePoint option.
Moving around using the default SharePoint form & custom form:
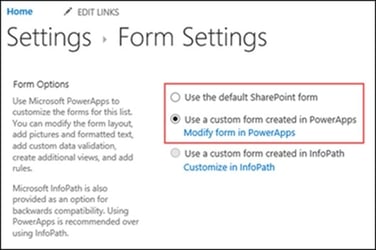
To do this, select Settings from your list, choose List settings and select Form Settings.
Once you are in the Form settings window, select any of the below options and choose OK:
- Use the default SharePoint form – Your SharePoint will use the default SharePoint form for your list.
- Use a custom form created in PowerApps – Your SharePoint will use the form that you customized in PowerApps.
Deleting custom list form:
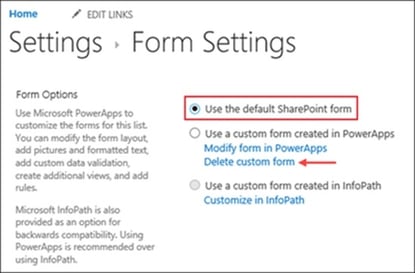
To enable this, select Settings from your list, move to List settings and click on Form Settings. On the Form Settings window, move towards Form Options and there you can see Use the default SharePoint form. You'll be able to see two more radio buttons where you need to select Delete Custom Form i.e. under Use a custom form created in PowerApps. This will help you delete the custom forms that you have designed in Microsoft PowerApps and your form will change to the default SharePoint form.
If you haven’t tried out PowerApps yet, I recommend you follow these steps for your desired SharePoint lists to see just how easy it can be. You may also want to take a look at our blog post on 'How To Share PowerApps With Multiple Users?' to learn a little more about the untold potentials of PowerApps.
Hope you liked the post. Have a good day.
Book a Live demo
Schedule a live demo of Dock 365's Contract Management Software now.
Written by Sajin Sahadevan
He is a Microsoft Certified Technology Specialist cum Digital Marketing Expert and has experience of 6 years. He loves learning about latest technologies like CRM, collaboration tools, marketing solutions etc.


